SHARE THIS
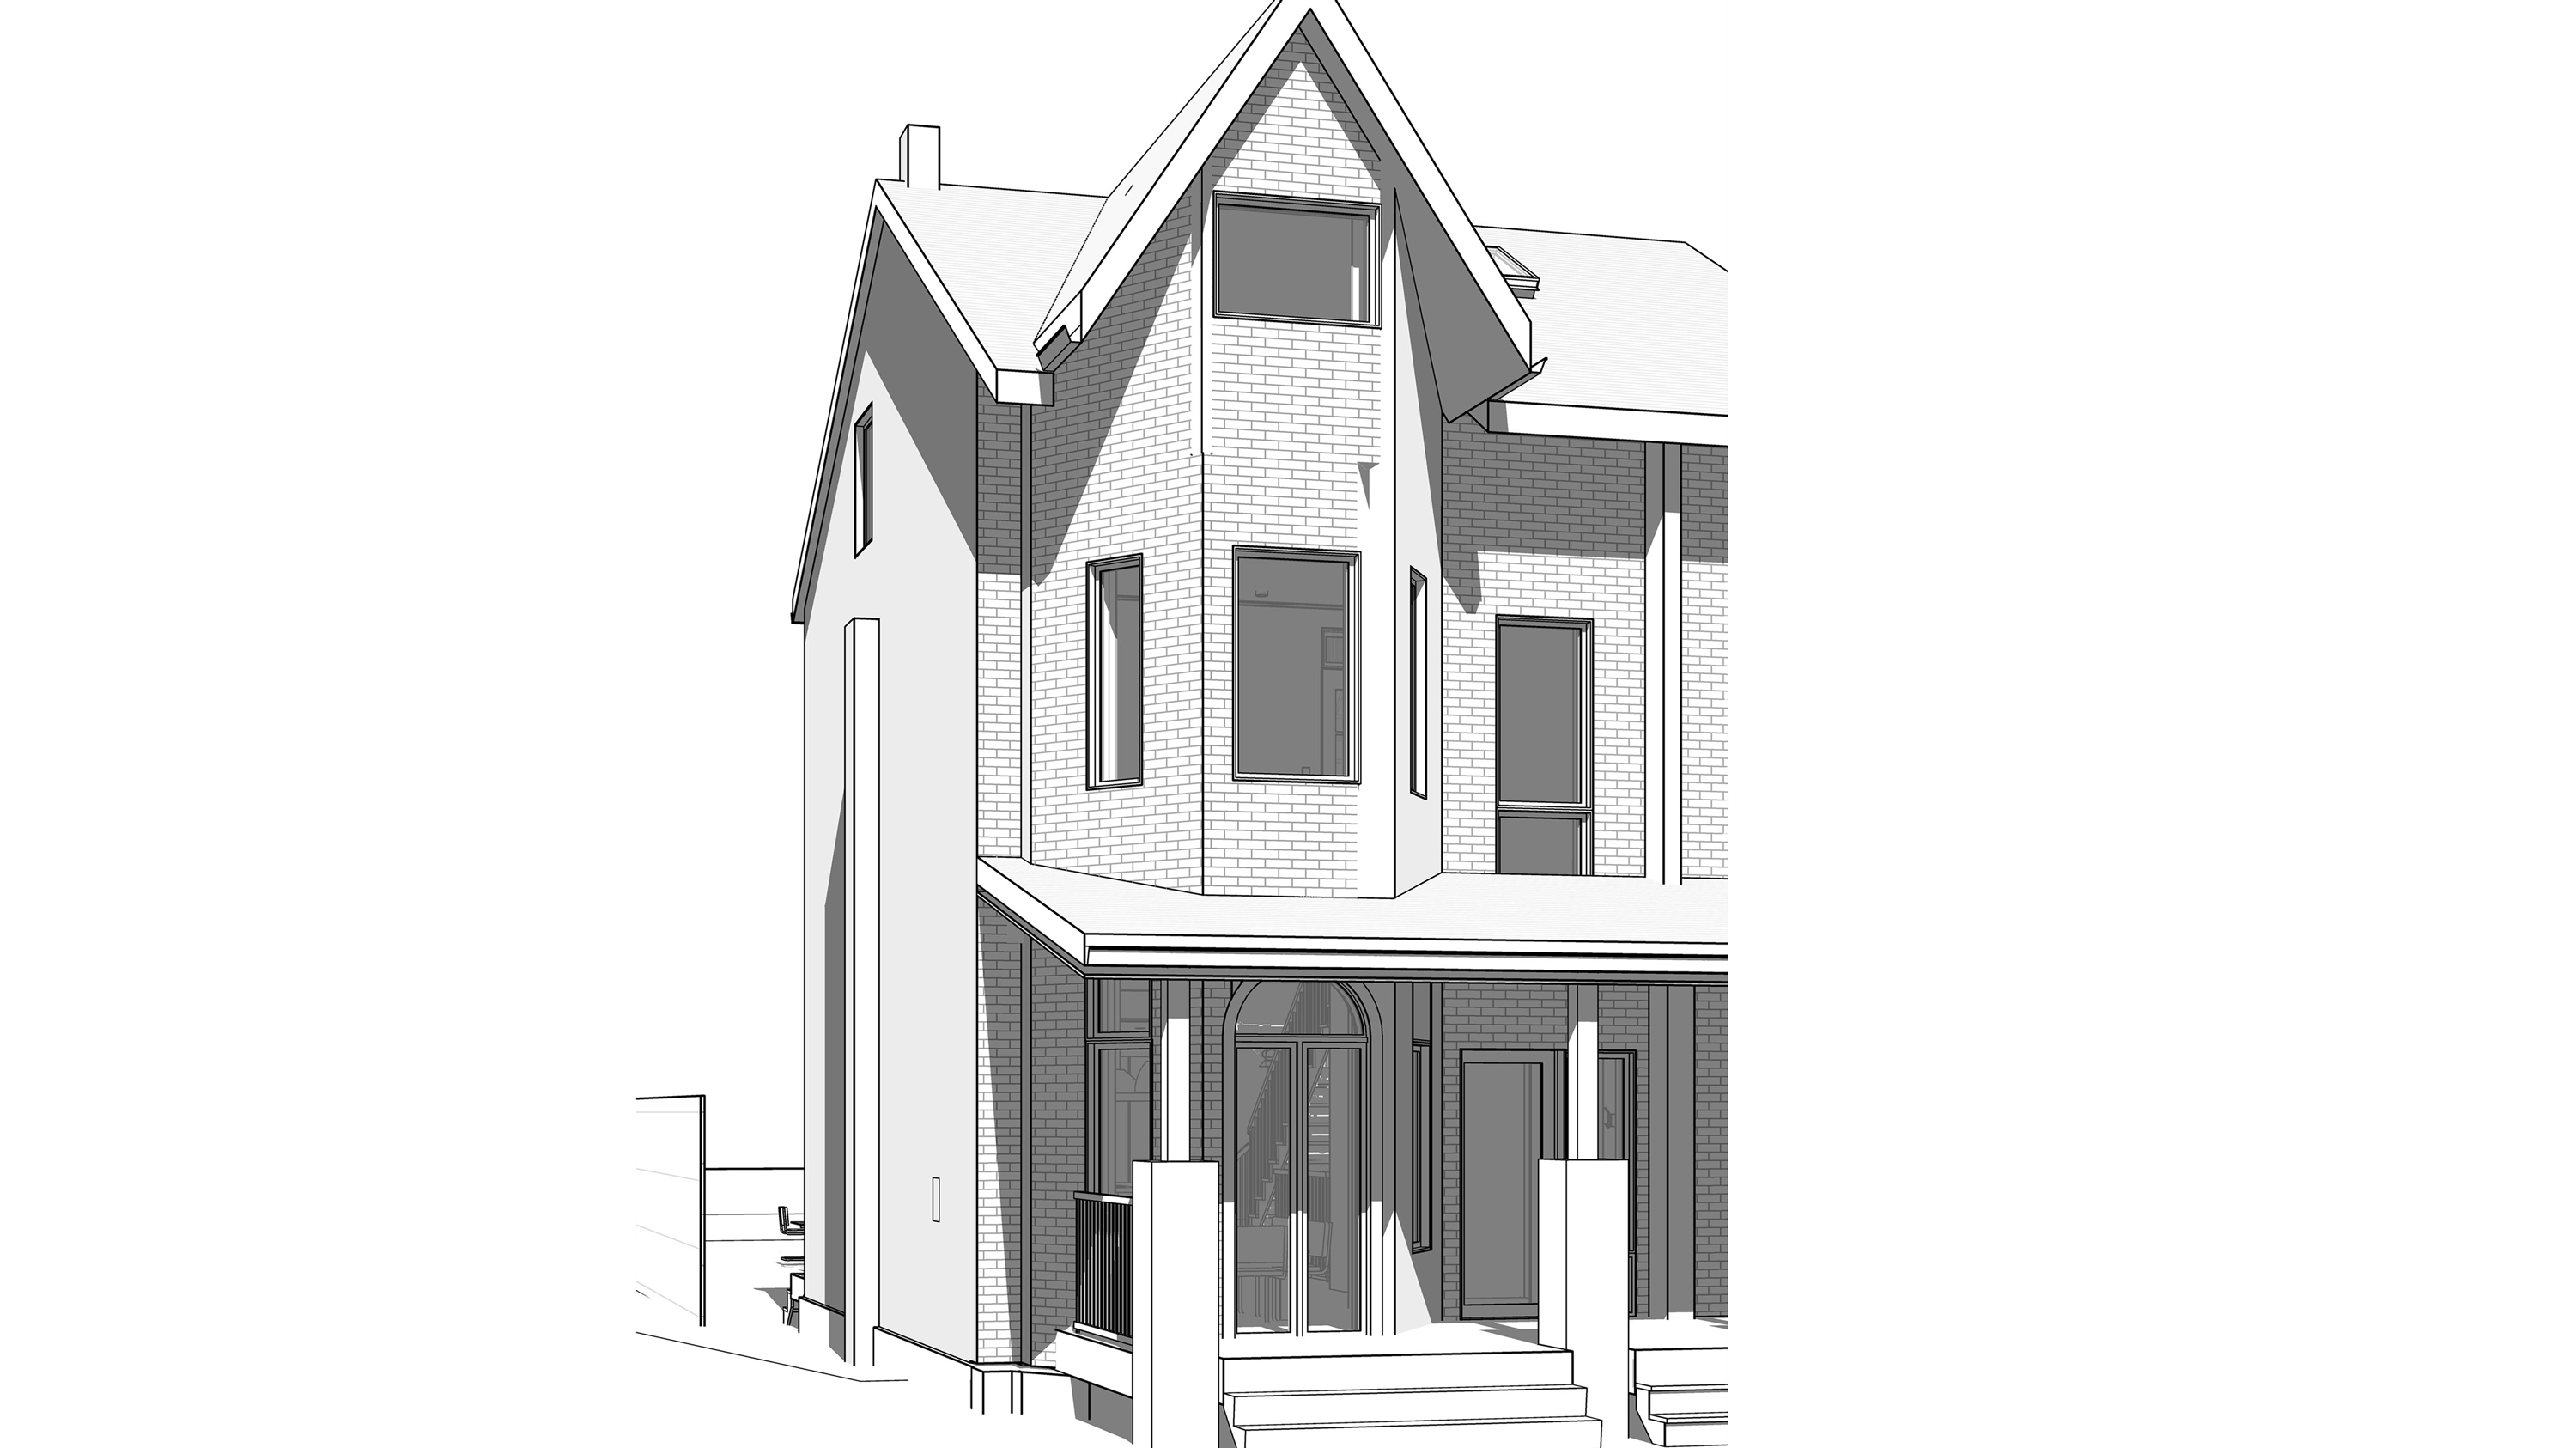
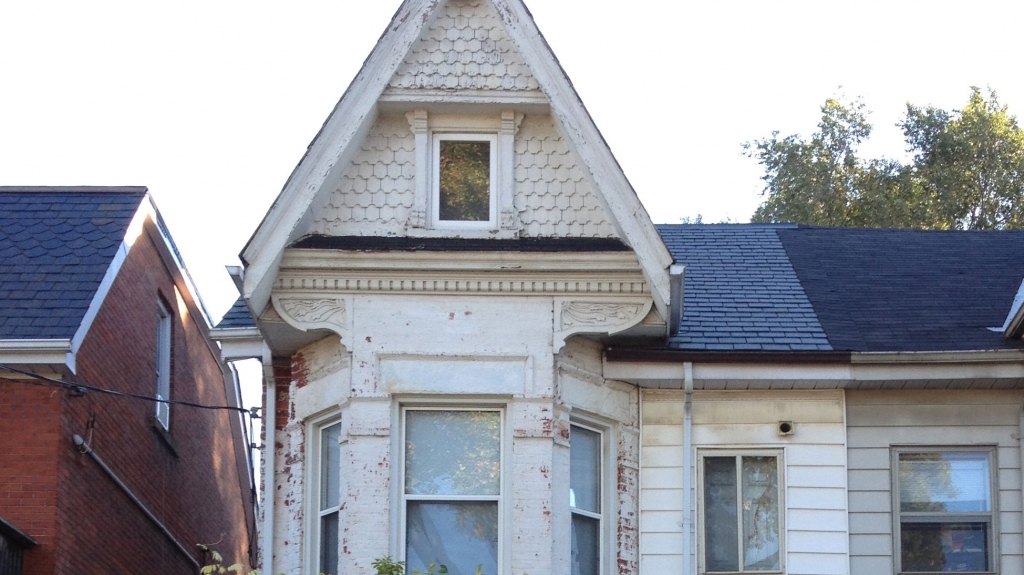
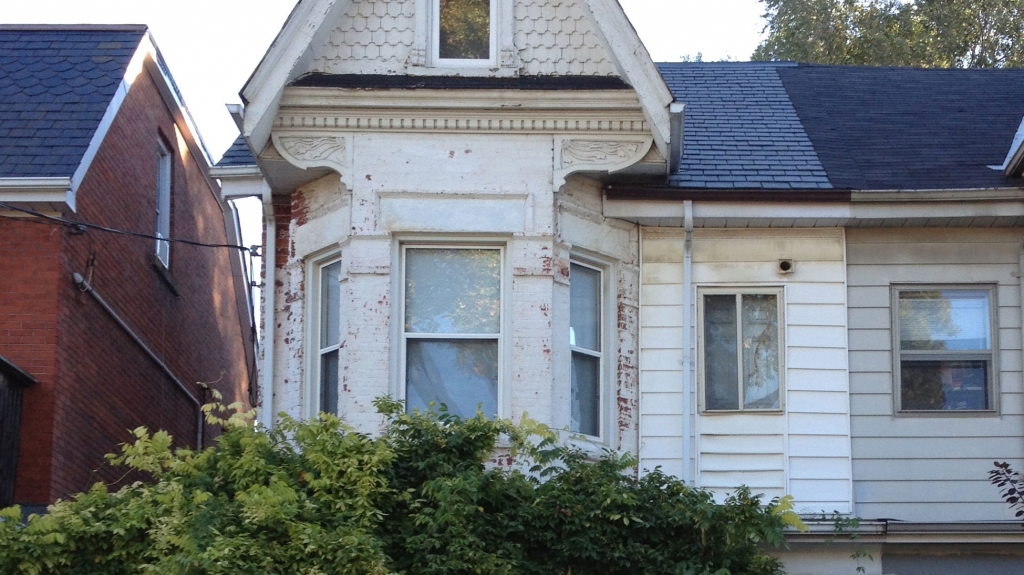
Bickford Park House is a contemporary renovation of a classic semi-detached Victorian house in downtown Toronto. This beautiful house hits all the marks in Toronto real-estate. Nestled in central-west Toronto, the residential tree-lined street it faces is quiet and friendly. The building backs onto a laneway in the east, which acts as bike parking for the family and car parking for guests. This neighborhood has everything a Torontonian would need, all within walking distance. It sits close to TTC stations and bus stops, as well as countless parks, schools, stores, and restaurants. The central location and beautiful brick exterior make this house a total keeper, though the layout and interiors needed updating to better suit our clients’ evolving needs. Our clients have been living in this house for 20 years, but had been previously renting out portions of it as apartment units and individual rooms. Now that they have their own family, they want to consolidate the home into a single family dwelling.Intro to Bickford Park HouseGo To Project Page
The Goals
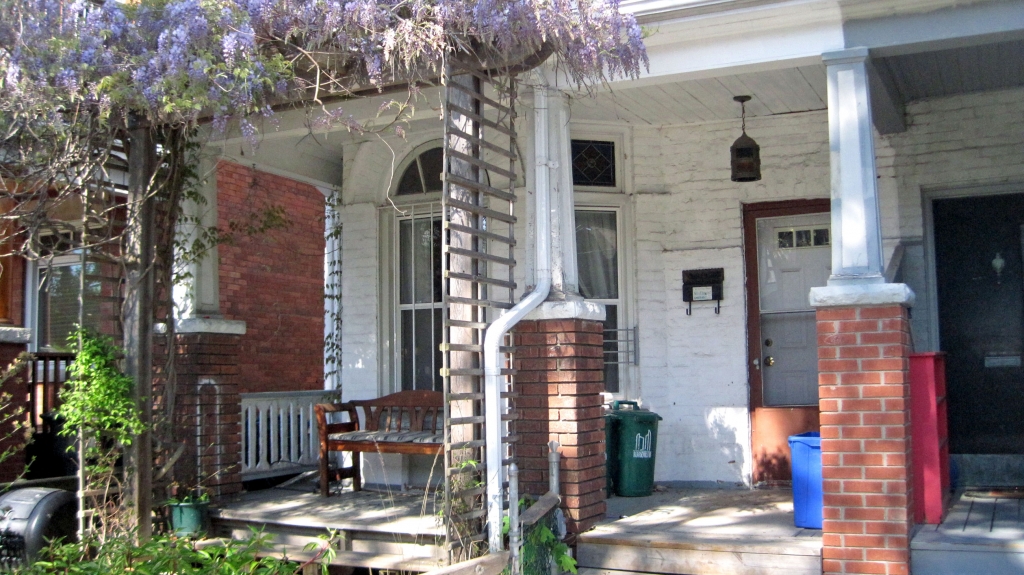
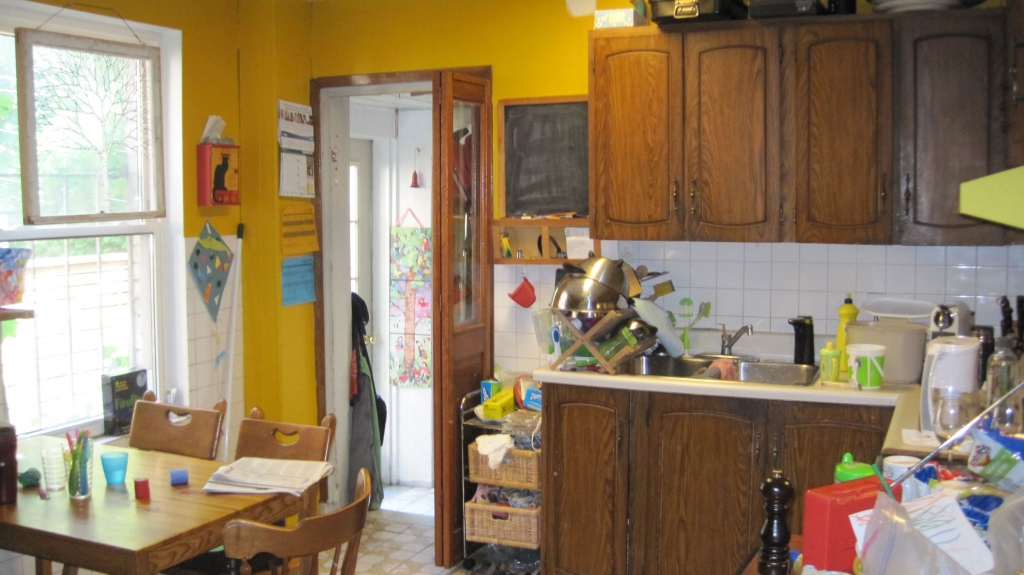
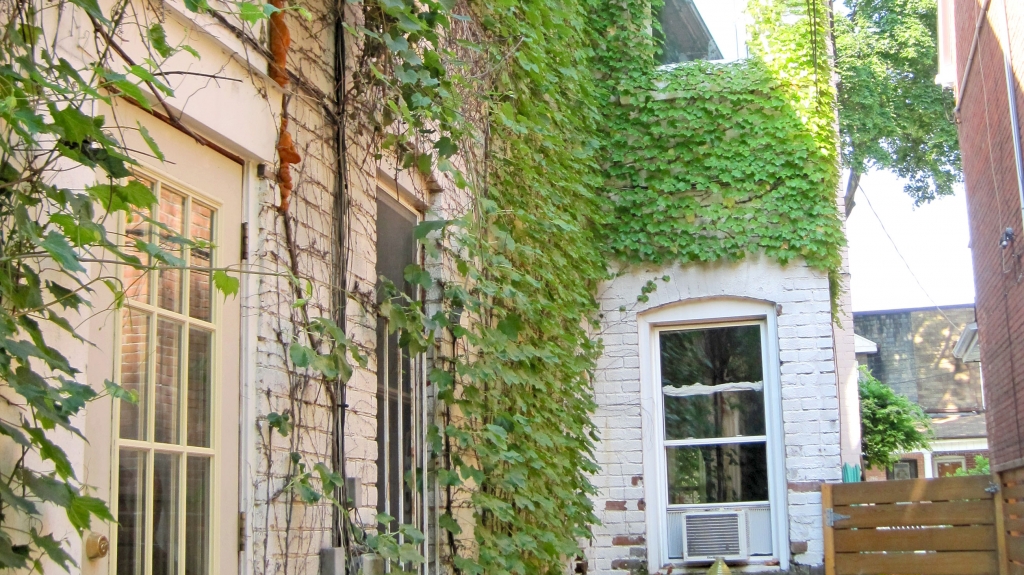
We decided together to gut the inside and rejuvenate the interior, making it a more contemporary, open-concept space where they can work, entertain, and enjoy spending time together. Keeping the overall classic look and feel of the house was important as well: our clients already love the house, so we wanted to make sure any drastic changes only strengthen their sentiments. They particularly love the beautiful, old Wisteria vine that crawls up the front porch, which they wanted to make sure was preserved through the entire renovation process. Our mission was to modernize the interiors to suit their needs as a single family (they love to entertain and cook!) without losing the home’s charm, and update the house into a more energy-efficient and environmentally friendly building.
We’ll be tracking the demolition and renovation over the next few months. Follow along as we expand the backyard space, rehabilitate the old load-bearing brick, strengthen the structure, and hold ourselves back from finishing the basement! We’re eager to turn this multi-unit Toronto house into an idyllic and energy-efficient family home, so stay tuned for more updates from this reno!
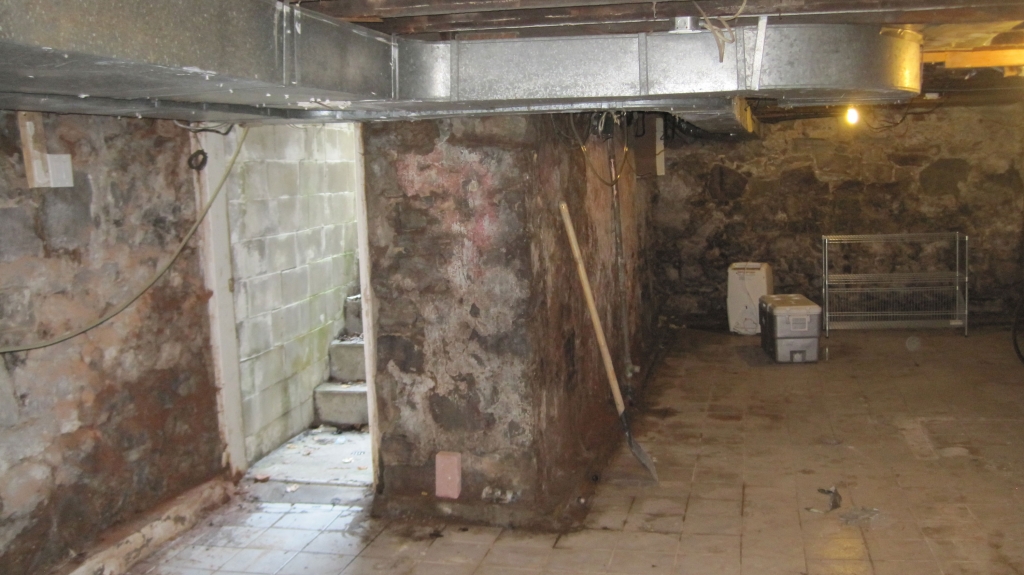
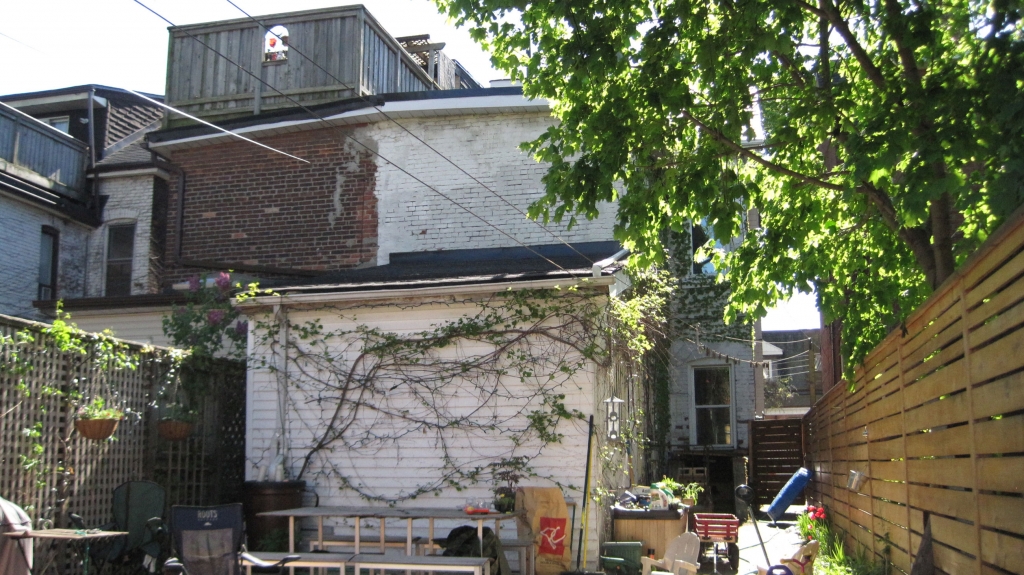
The Bickford Park house is classically Torontonian: a Victorian brick semi-detached house in a central location with a quiet and friendly residential feel. This house sits worlds apart from the new glass condos and high-rises popping up on the Toronto horizon. But this house had other distinctly Torontonian qualities that weren’t quite as desirable. Before our clients decided on a major reno, the aging brickwork held separate apartment units and an old poorly built rear addition that ate into backyard space. Solares’ retrofit is a much needed modernization on a classic building – we will be consolidating the many units into one family home while making the building as energy efficient and air-tight as possible. In the design process, one of the major moves was to remove the rear addition completely. This makes the project very unique – one doesn’t typically remove square footage during a renovation! But removing the addition meant more backyard space and a slightly lower construction cost, and our new design gave our clients more than enough space for everything they wanted without the addition. A challenge we were faced with was keeping the basement unfinished. As a group, we decided that leaving the basement as a second phase would free up the budget for the main renovation. This became a tricky technical issue, as we didn’t want to do any work that would later have to be undone in order to underpin and finish the basement. Our clients wanted to preserve the existing aesthetic of the home. So for the exterior, they wanted a rejuvenation, as opposed to a jarring redesign, so our plan was to keep as much of the exterior as intact as possible. We did, however, find some crumbling brickwork during demolition that needed major attention, but we’ll talk about that more in our next post!Bickford Park’s New Floor PlanGo To Project Page
Now the Fun: Floor Plans!
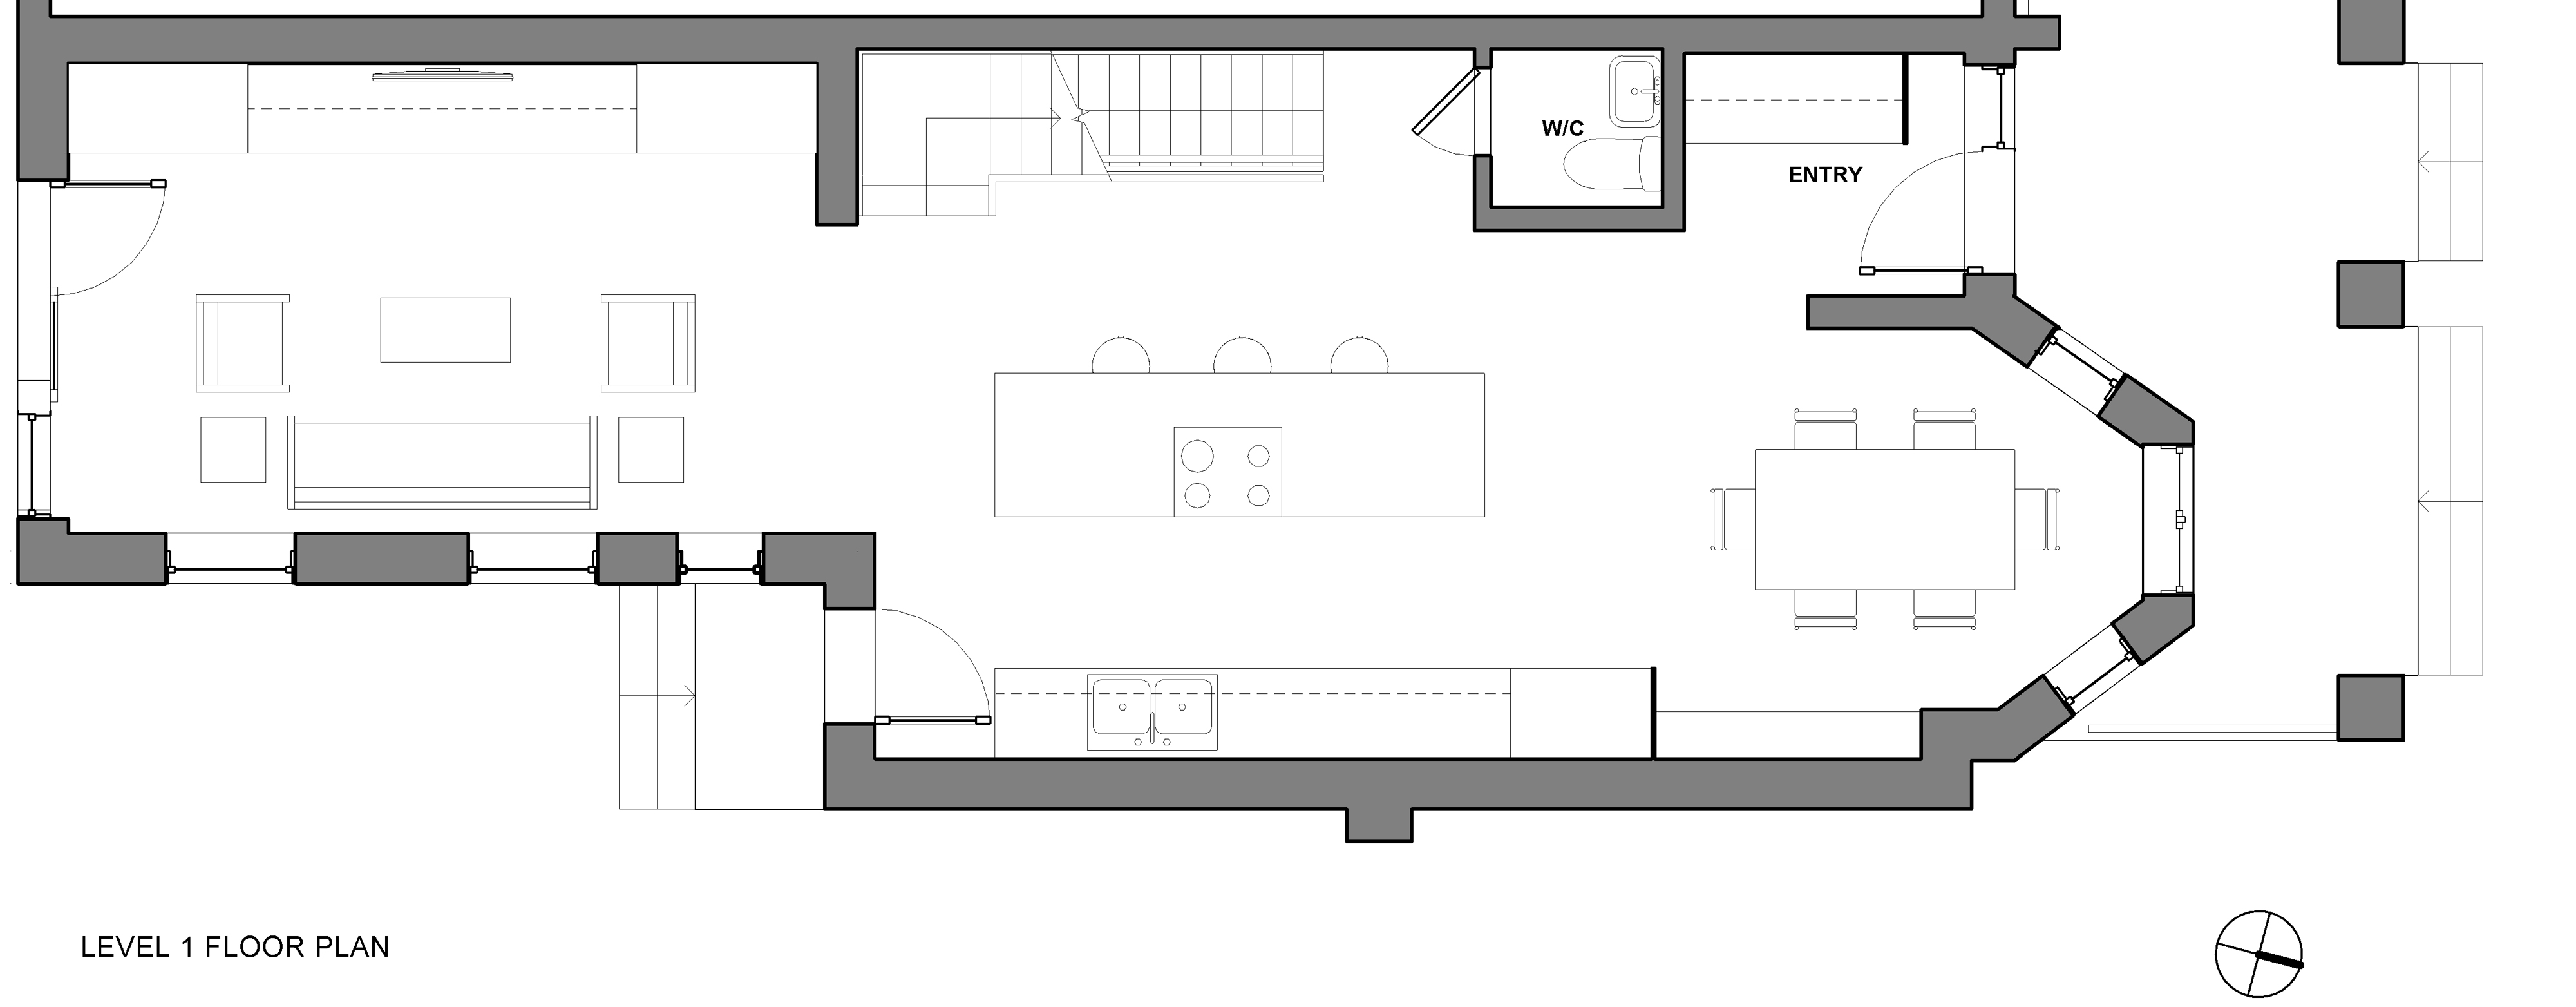
The main floor, totally open-concept, is the heart of the house: with a front dining area, central kitchen, and large rear living area. The lively family wanted big and open spaces to host huge dinner gatherings with friends and family. The living area at the back of the house leads out to a newer, bigger backyard, thanks to the removal of the old rear addition. The main stair was rebuilt and reversed to enable better flow between all the levels. Tucked out of the way on the basement stair landing is a small 2-piece main-floor washroom, a much coveted feature in any Toronto home.
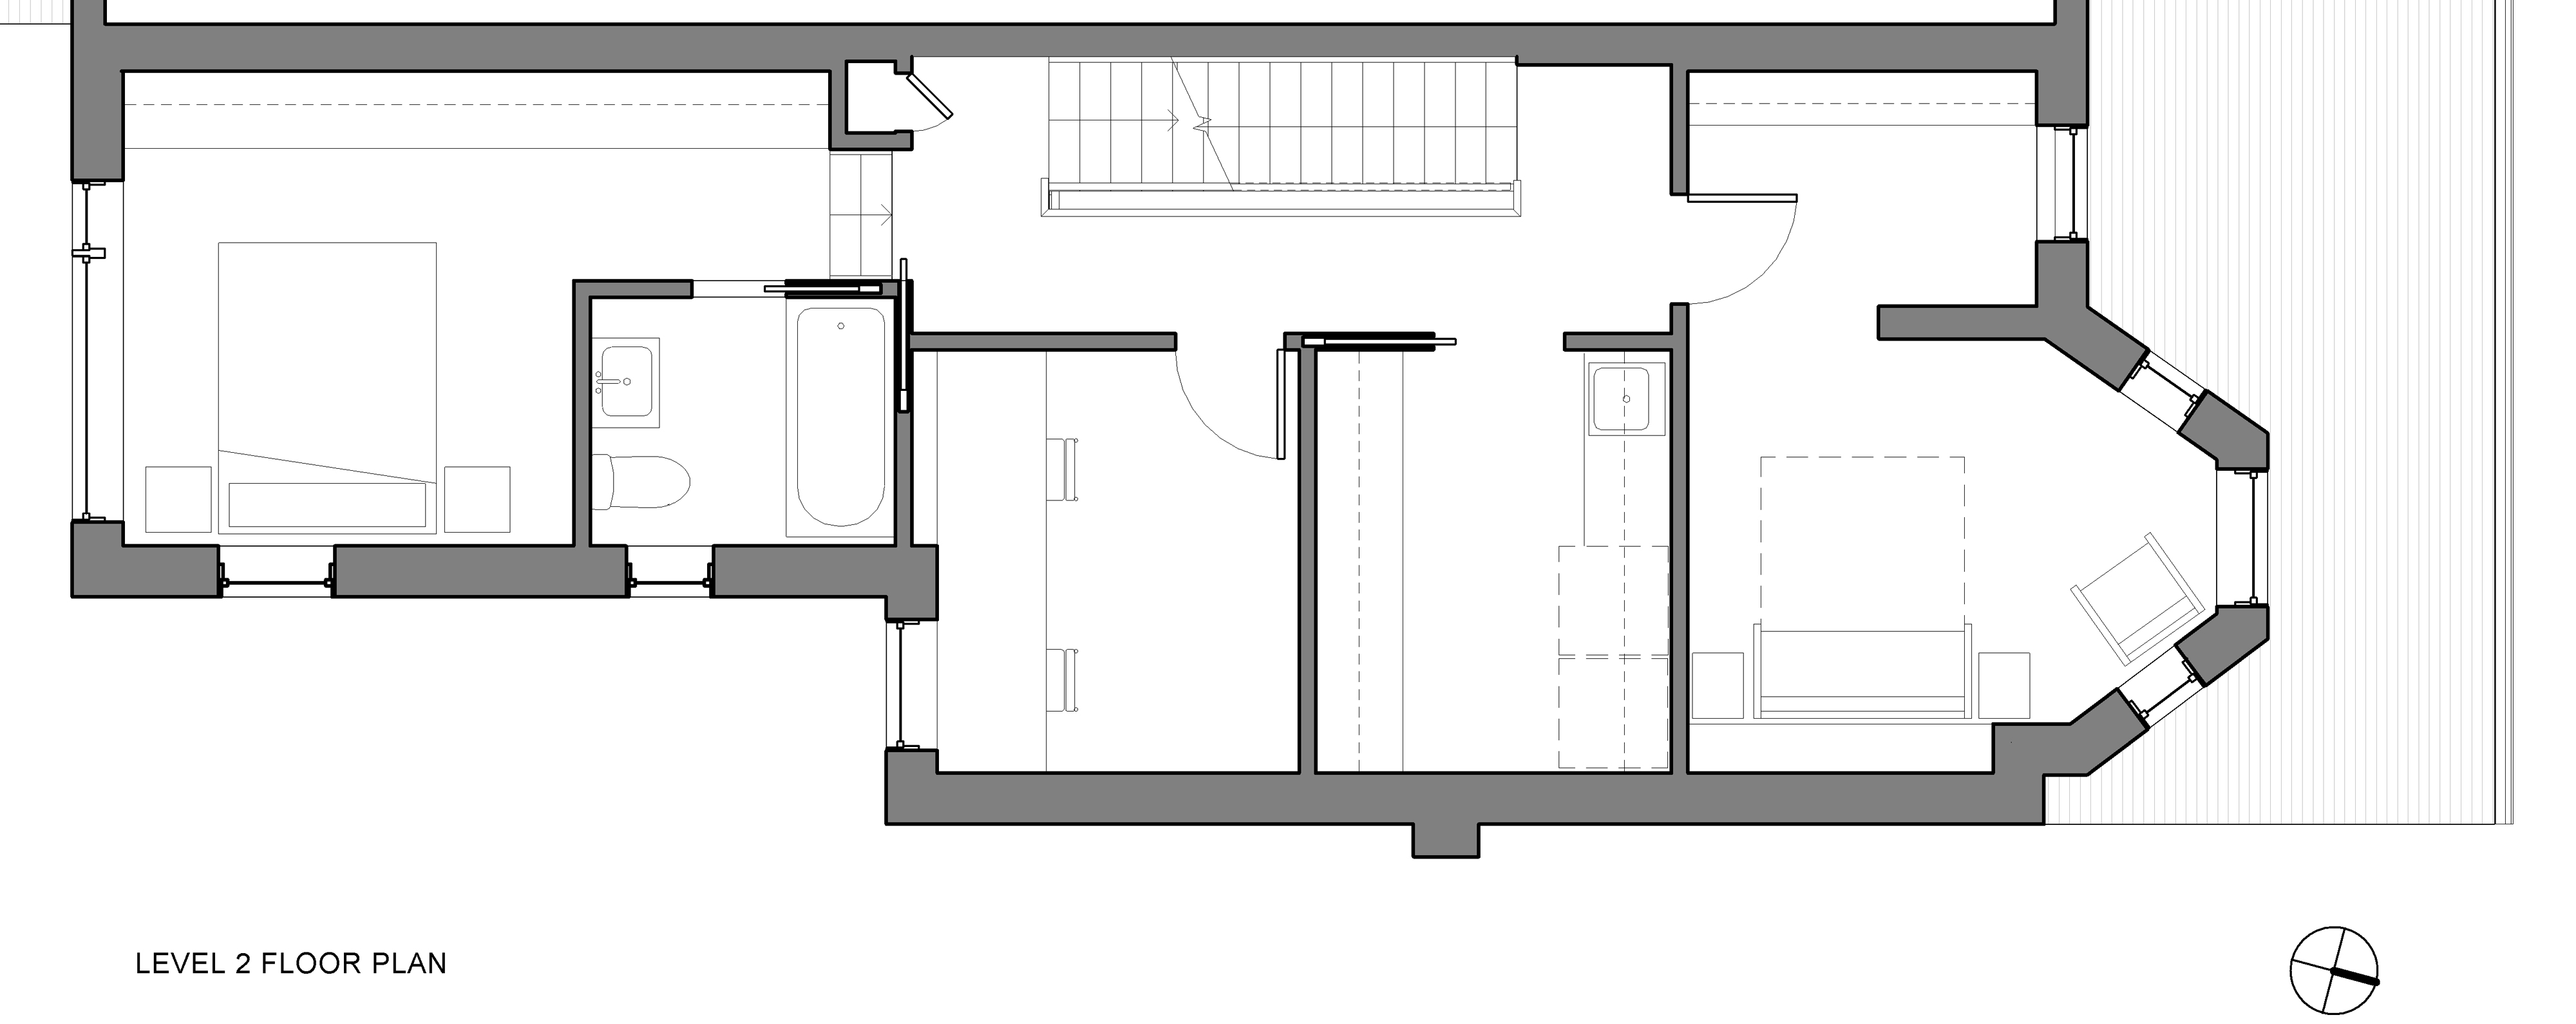
On the second floor, the master suite with en-suite bathroom is located at the back of the house, with a large east-facing window overlooking the backyard. This level has ample space for two home offices, as both parents often work from home. If needed, one (or both) of these rooms could be converted to bedrooms in later years. Between the two offices is an awesome laundry room with tons of storage and ample space for air-drying clothes.
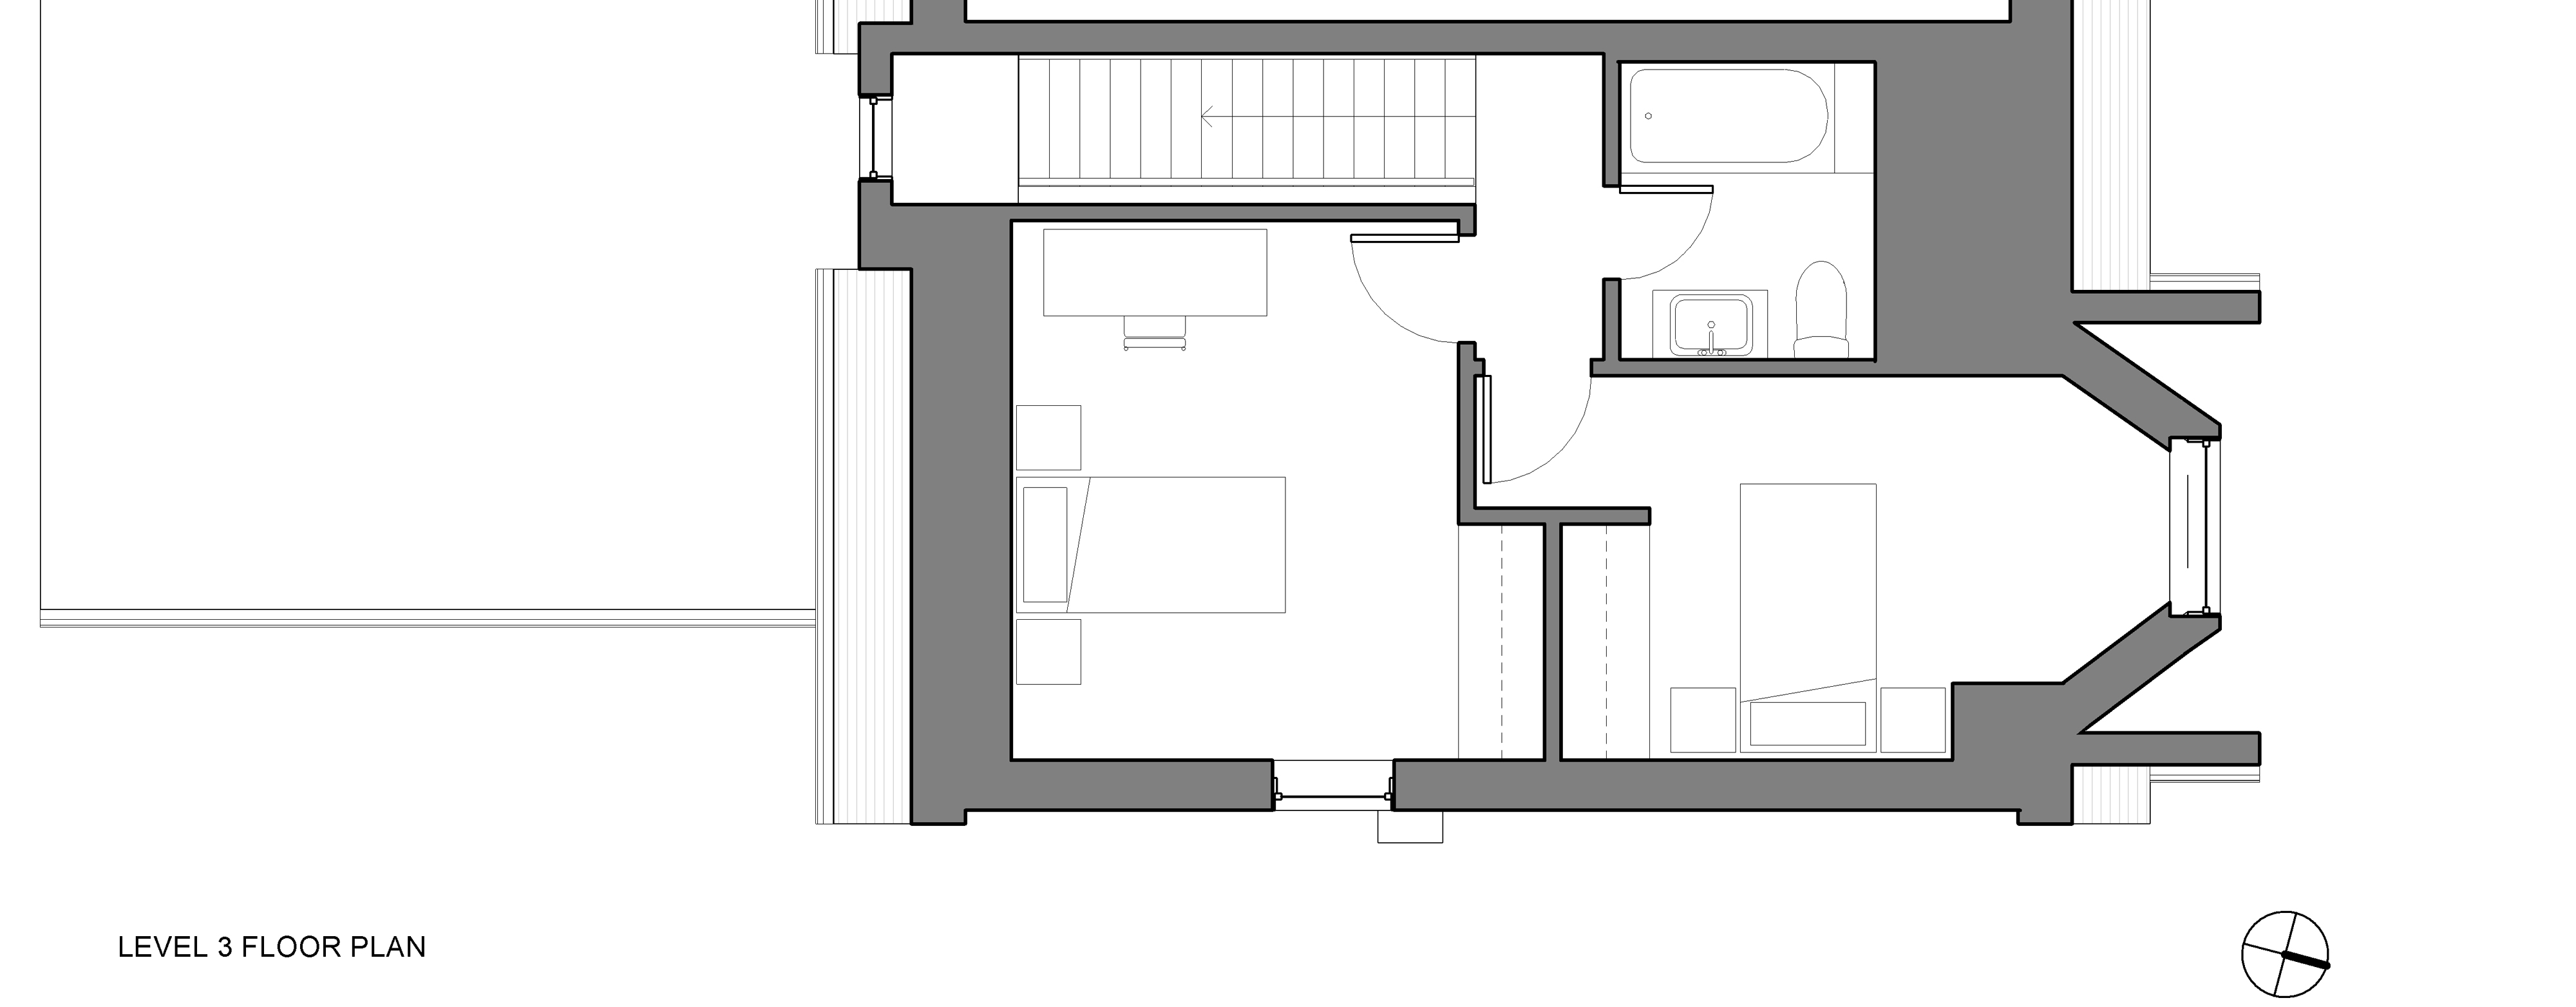
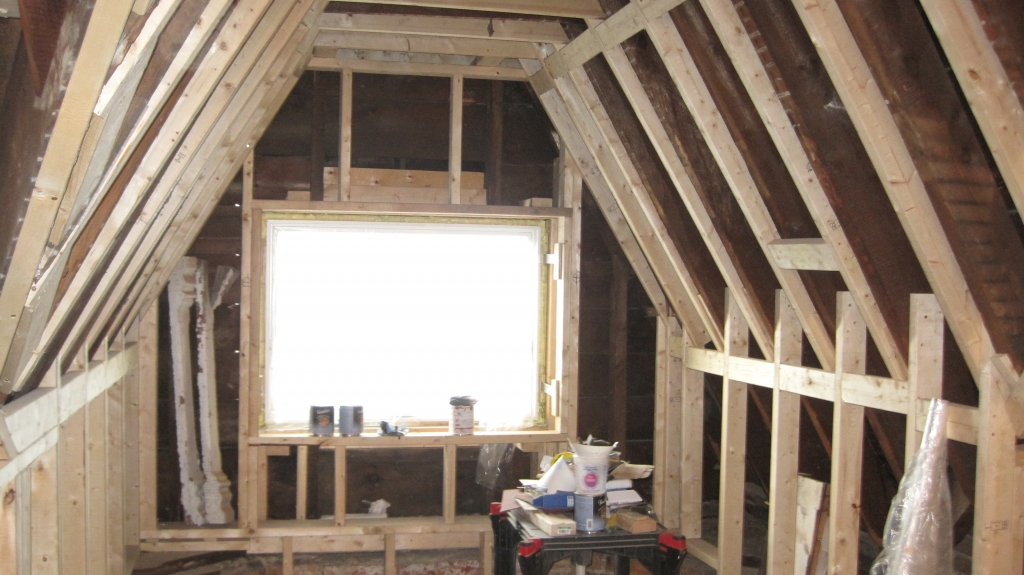
The third floor attic is the kids’ domain. The steeply sloped ceilings and asymmetric windows create distinct bedrooms, and a cozy, shared bathroom. We toyed with the idea of putting in skylights but our clients had recently replaced their roofing with period-appropriate slate shingles.
This house is on its way to becoming a home. We’ve seen the “before” photos, but I’m itching to see the “after” pictures!
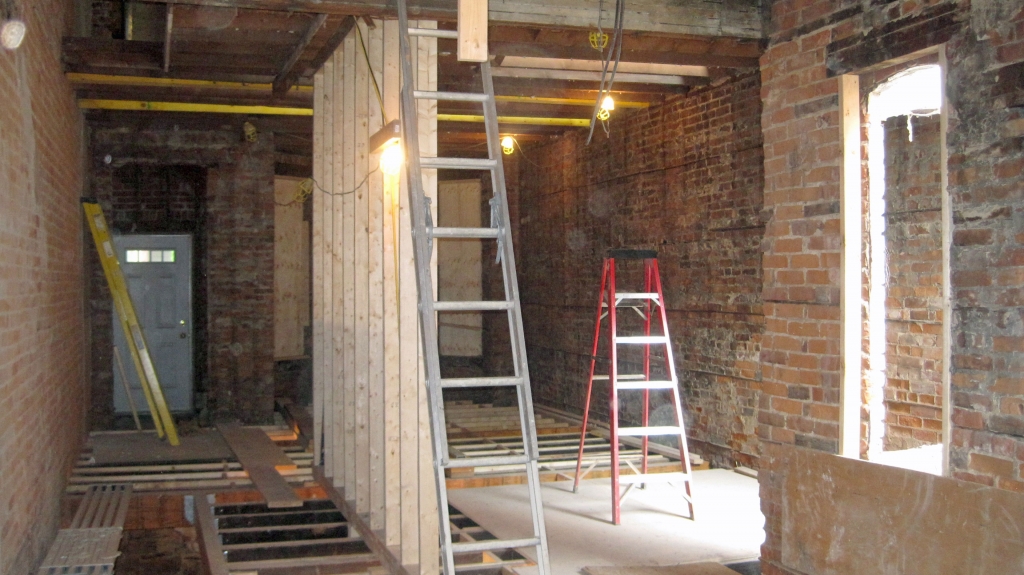
With the interior of our Bickford Park project stripped clean, our construction could begin nearly from scratch on this beautiful Victorian house. There were a few technical challenges that set this project apart from some of our other, more straightforward renovation jobs, but our general contractor, Jesse Hayes, helped us through the gutting and rebuilding process. A good friend of our clients, he had just finished a full gut-reno on his own home. Having had plenty of recent practice, our clients were confident in his services! The demolition process went smoothly, and felt like a refreshing cleanse for everyone involved – we purged the interior, ripped off the back addition, and removed all evidence of the aging work previously done on the house. Man, did it feel good. But then we met our first roadblock: crumbling brickwork.Dissolving Bricks in Bickford ParkGo To Project Page


The Bricks
On our very first visit to the house, at the start of the design process, we realized that the brick on the east wall of the house had been plastered over. At that time we immediately suspected something wasn’t right with the bricks. Generally one doesn’t plaster, paint, or cover perfectly good brick for no reason – especially load-bearing walls.
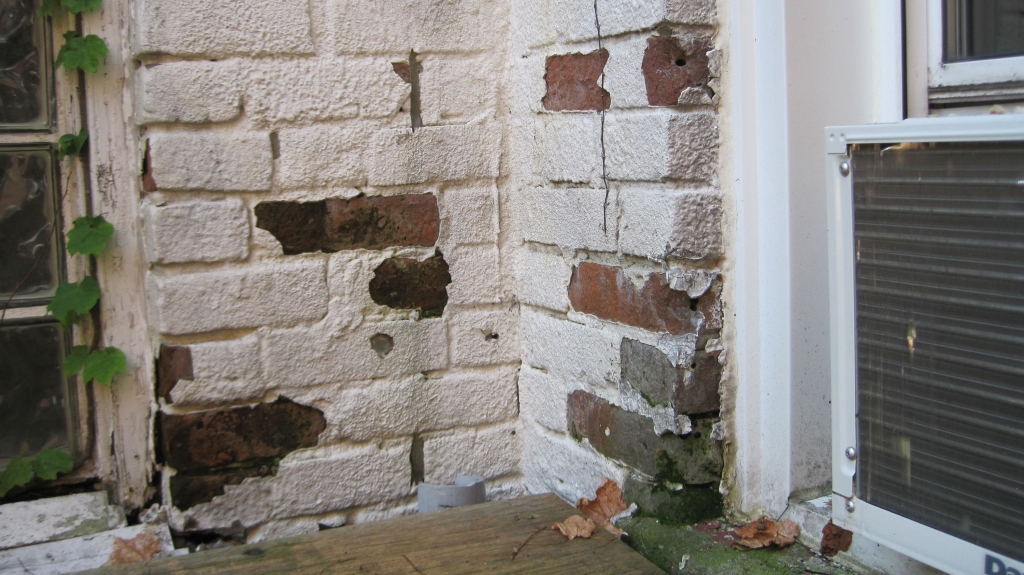
Solid brick makes a great, durable exterior wall, as bricks are designed to be able to withstand weather and precipitation, and dry off with minimal damage, like an adobe wall. In the early days of brick houses, wet brick would dry with help from the heat of escaping interior air, mainly due to poor insulation and air sealing. However, in better insulated houses with less escaping heat, bricks need to be kept as dry as possible. Badly draining eaves troughs and leaky downspouts can be the death of a brick wall. A saturated, wet brick that can’t dry out can become damaged, crumble and dissolve, or even freeze solid during winter months and burst. Yikes.
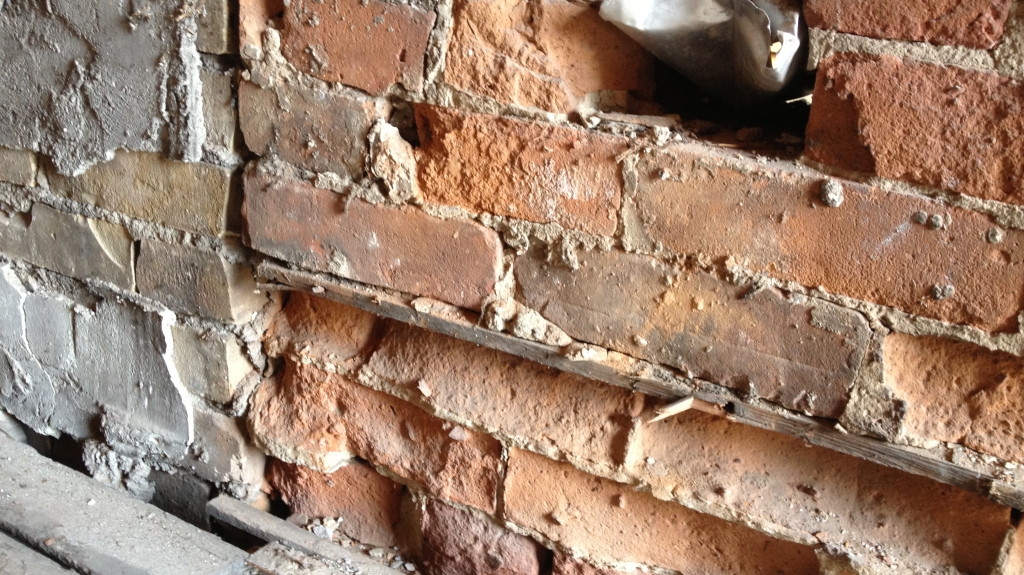
So now you understand why we were nervous when we saw the plaster: we were worried these bricks could be badly damaged from years of saturation. And, unfortunately, it turned out we were right – when we uncovered the brick from the inside, it was so damaged that it dissolved into dust at the touch.
From the ground up 30 inches, both brick wythes (the interior and the exterior brick layers) along the entire east side of the house had to be replaced, a hugely expensive, painstaking, and (alas!) necessary undertaking. The entire wall then needed to be protected from future degradation by re-cladding and insulating, but that’s a story for the next blog post.
In the end, we suspect someone probably sandblasted the bricks to “clean” them back in the day, and, upon realizing they were falling apart, attempted to hide the evidence with plaster. But quick-fix solutions like plaster and paint don’t fix broken bricks.
Floors and Shear Walls
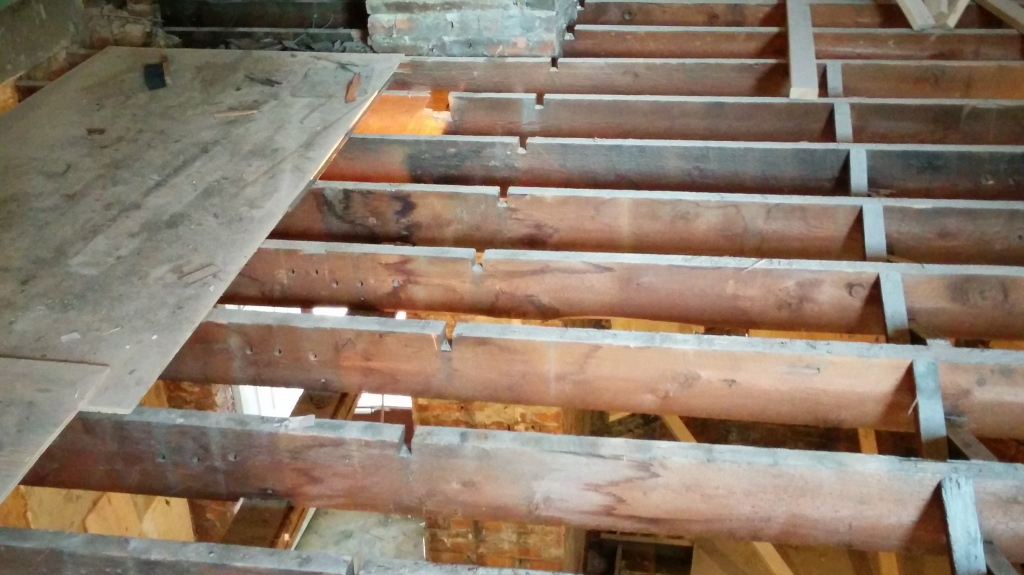
After the brick was replaced with block, we then “sistered” every floor joist, which means we married each existing structural member with a new one. The floor joists were sagging and bowed from age, making the floor out of level from front to back by a few inches. By sistering every joist, we were able to level and strengthen the entire floor. Sistering is a huge undertaking – the entire sub-floor must be removed simply to gain access to the wooden joists! But it was worth it for a nearly brand-new, much stronger and more durable floor.
Because the main floor was largely open concept, we installed shear walls to keep the large room on the main floor braced. These small, 4ft long, super reinforced wood-frame walls are sheathed on both sides with plywood and are connected through all three floors, from the footing in the basement all the way up to the third floor. These walls help resist lateral (side-to-side) loads. While a house might not fall down without these shear walls, they help prevent other problems which could occur in the structure, like cracks in the drywall or shakes and tremors in the walls. The first floor shear walls flank the stair, which integrates them seamlessly into the design of the house.
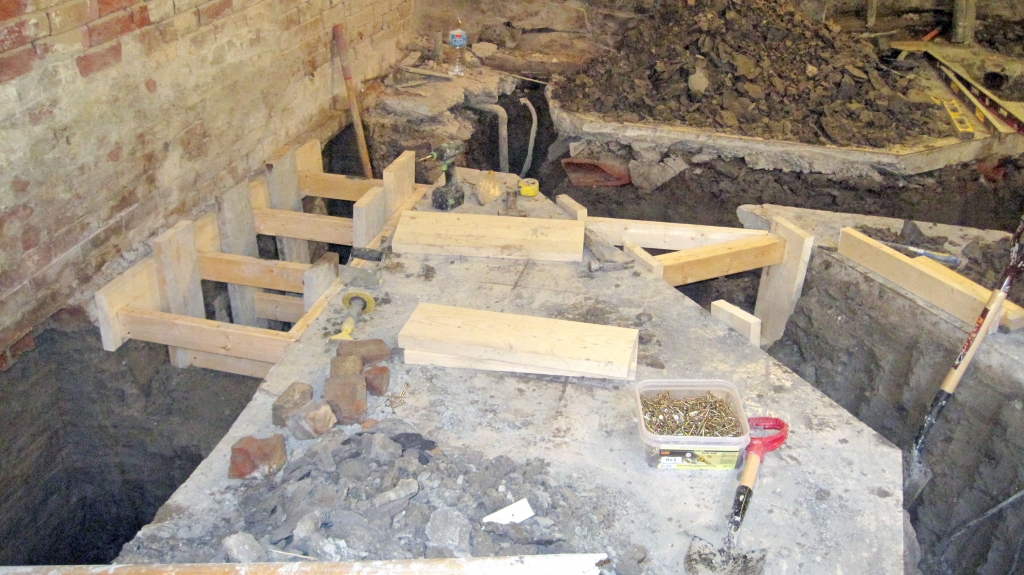
Our clients were adamant that finishing the basement would be a second phase in order to preserve budget. That being said, we still had to plan for the future by ensuring all structural work done in the basement (new footings for the shear walls) be done 3’ below the existing slab level. That way, in the future, our clients can underpin without having to redo the new structural work.
In short, we did everything we could possibly do to this house, aside from ripping it out and starting from scratch! Completely demolishing and rebuilding might have even been easier, but there were plenty of reasons why a total demo was not possible:
Firstly, ripping down a semi-detached house is a very complicated process, and should only be done out of absolute necessity. Secondly, the character and style of a Victorian house is surprisingly hard to mimic – new, Victorian-esque houses simply don’t look like the originals. And thirdly, our clients simply wanted to preserve the original character of their home – they wanted a rejuvenated home, not a new one.
Keep checking in with us as we build back this Bickford Park house, one brick and joist at a time!

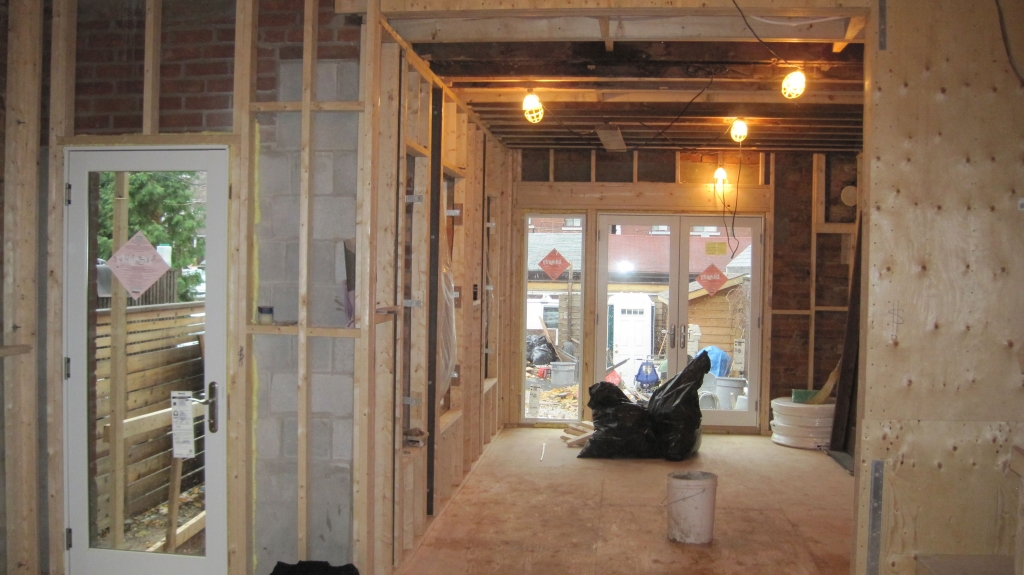
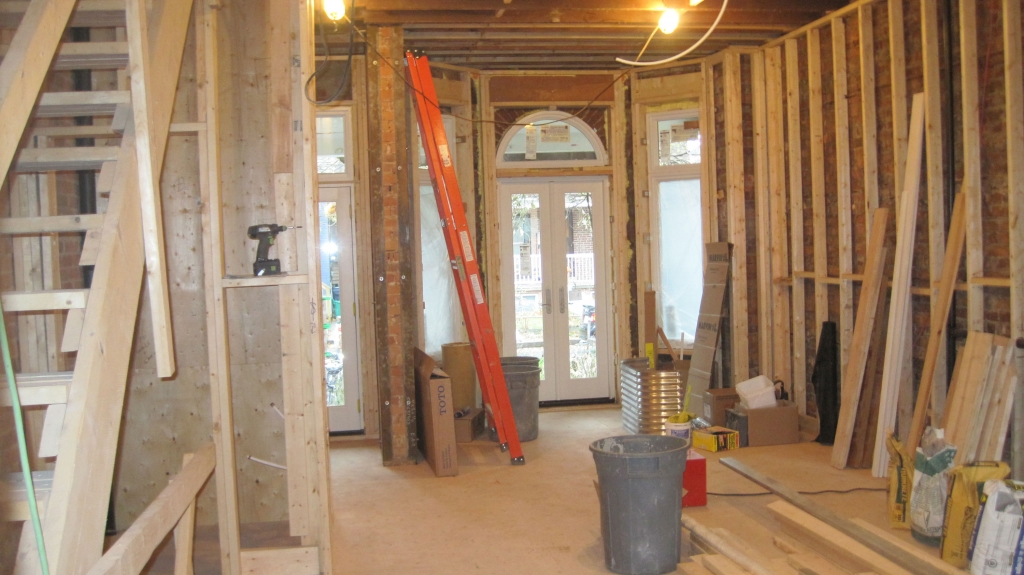
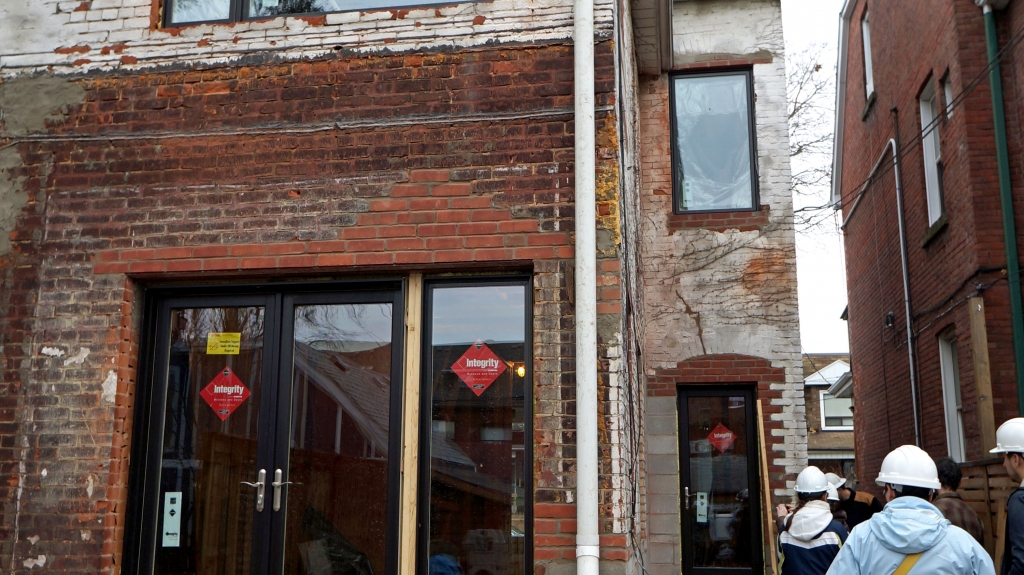
Another project, another envelope! Bickford Park has been decked out with insulation, cladding, roofing and drywall, and we’ve added tons of windows and doors to brighten the space up. We opted for spray foam insulation in this project, a more standard approach than other projects of ours. This spray foam is installed directly to the inside face of the load-bearing walls and between the studs of a new wood interior wall. This new stud wall houses new electrical and plumbing. Ideally a wood stud wall is set away from the brick wall to allow a continuous layer of insulation behind it. Because the house had width to spare, we made this gap 2-inch, double what we typically do. Usually homeowners are wary of losing any floor space, but our clients were fine with losing the extra inch in order to increase their overall comfort. We installed 4 inches of spray foam between and behind the studs which gave us an R25 wall. The remaining 1.5 inches of space between the spray foam and the drywall acts a chase where plumbing and electrical wiring can be installed without being encased in foam. Encasing piping and electrical units in foam makes it very difficult to locate and fix problems, if they ever occur. The EIFS on the east and rear walls of the home added both cost and additional insulation to this project. EIFS (Exterior Insulating Facade System) is an exterior insulation method, where the house is covered in EPS foam that is then coated with a thin layer of stucco. It is not a hugely durable house exterior, like brick or masonry, and has less aesthetic flair. However, it was necessary because this home’s vulnerable bricks needed protection. The company we used was Durock, one of the larger, more well-known EIFS manufacturers. Durock makes an EPS board with a built-in drainage layer called Puccs, which we used with great results. First, a primer stucco coat is applied onto the brick to seal and protect the wall, and then goes the Puccs EPS foam. Mesh is then fastened to the foam onto which the stucco layers are applied.EIFS, Bricks & Blower Door TestsGo To Project Page

The Exterior
We installed spray foam to the underside of the roof sheathing, as we had to preserve the existing roofing by all measures – our clients had just installed beautiful slate shingles a few years ago, a beneficial albeit costly undertaking.
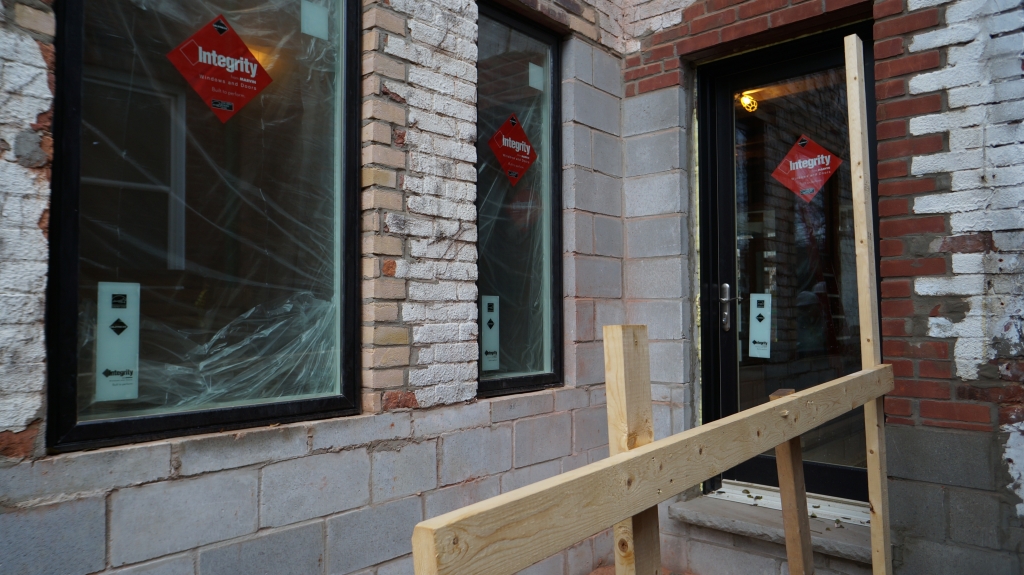
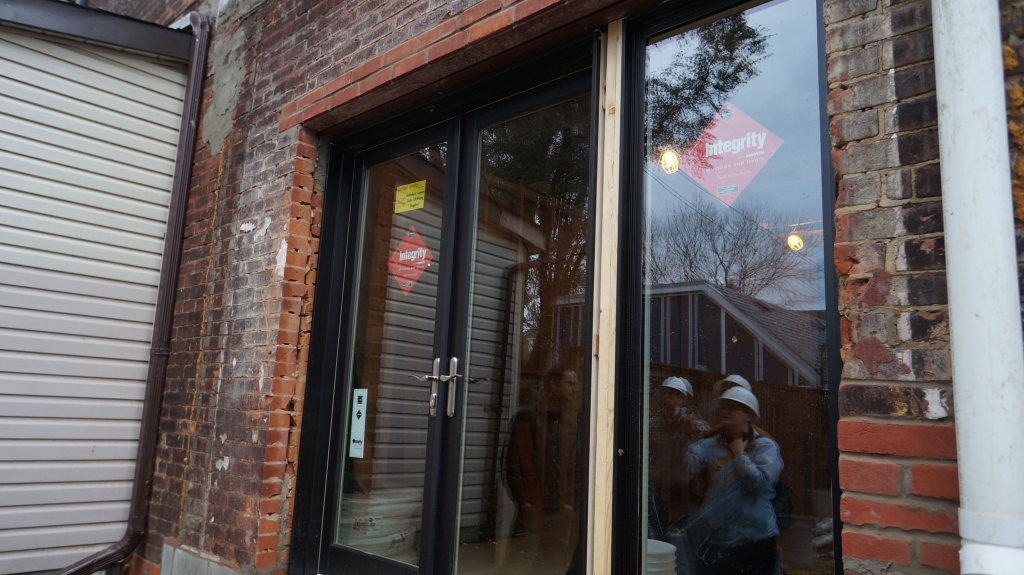
A company called Marvin supplied our windows and doors. Our clients chose double-glazed, wood-framed windows, which are aluminum capped on the exterior to protect the wood. They were attracted to the tactility and warmth of the wood. We added tons of windows all over the exterior, as many as building code, existing structure and our energy efficiency goals would allow. Where a well-insulated wall is R25, a great window might be R5. But windows are almost always worth the hit – they let in natural light and ventilation, open up the space, and are just plain pretty. Old Victorian houses are typically dark with very small windows – glass was expensive, and with insulation being nearly nonexistent back then, the less holes for air and heat to escape the better. Thankfully, we now have the power to insulate and add more windows to a previously dark and enclosed space.
Finally, we replaced the damaged bricks in the front load-bearing wall and preserved the ancient Wisteria Vine on the front facade, just as our clients wished! Then it was time to test our work.
Pre-Drywall Blower Door Tests
A word of Solares advice: Always test your envelope for leaks and problems before putting the drywall up. We believe that the air barrier is the most important part of the envelope, so we do blower door tests to verify its performance. If your air barrier leaks, no matter how much you insulate, your house will not perform well. A nice warm parka with the zipper wide open doesn’t do much good! These tests are unique to the Solares process – most people just assume if their envelope was designed properly it will work properly, but we know not to assume anything!
We used BlueGreen Group to test the spray foam before drywall was installed. This allowed us to locate over 70 microleaks and seal them up! The first test came in at 7.5 ACH (air changes per hour) which is quite high, but remember, the basement remains unfinished at this point and is leaky like a sieve! With all the micro-leaks sealed up and the main house finished we should be closer to 5 ACH. Once the basement is finished in a couple years, we should be closer to 3 or 2 ACH.
Blue Green used an infrared camera to locate all the leaks. IR cameras can only be used in the winter because they pick up the temperature differential between the warm interior and cold exterior. Cool, huh? (Pun intended!)
Next time we’ll talk about what goes in that space between the spray foam and the drywall, as electrical systems, plumbing, and heating gets installed!
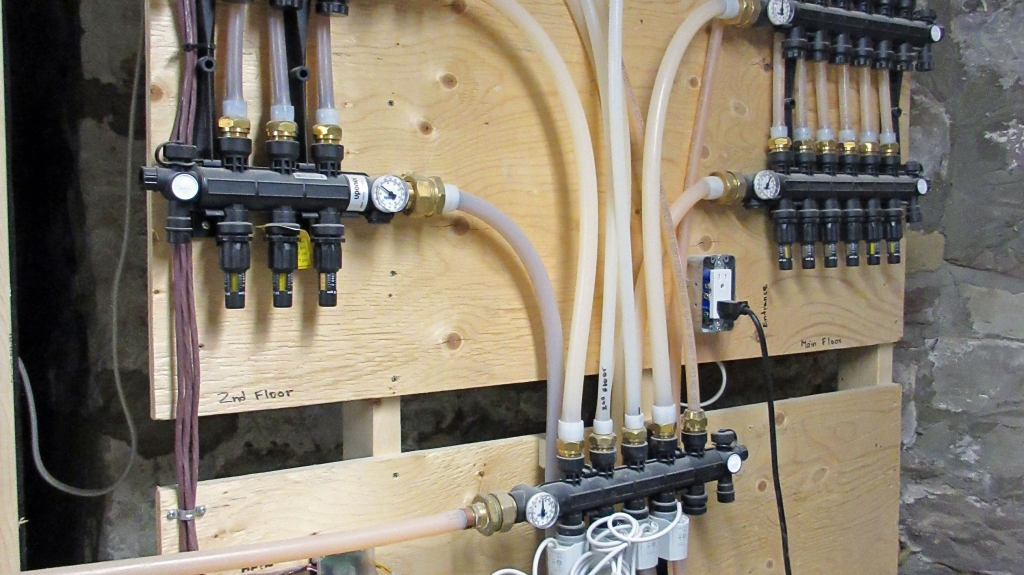
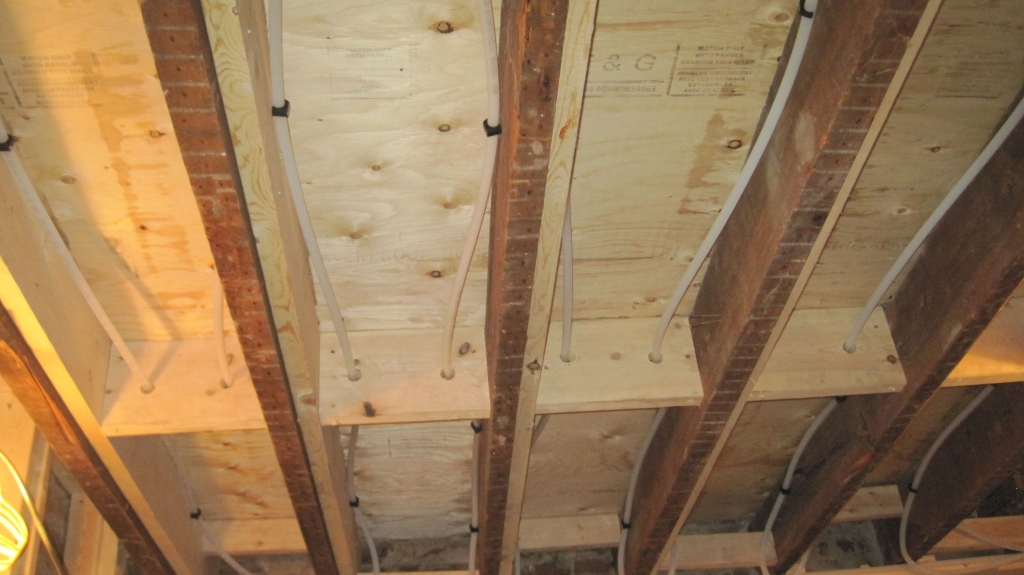
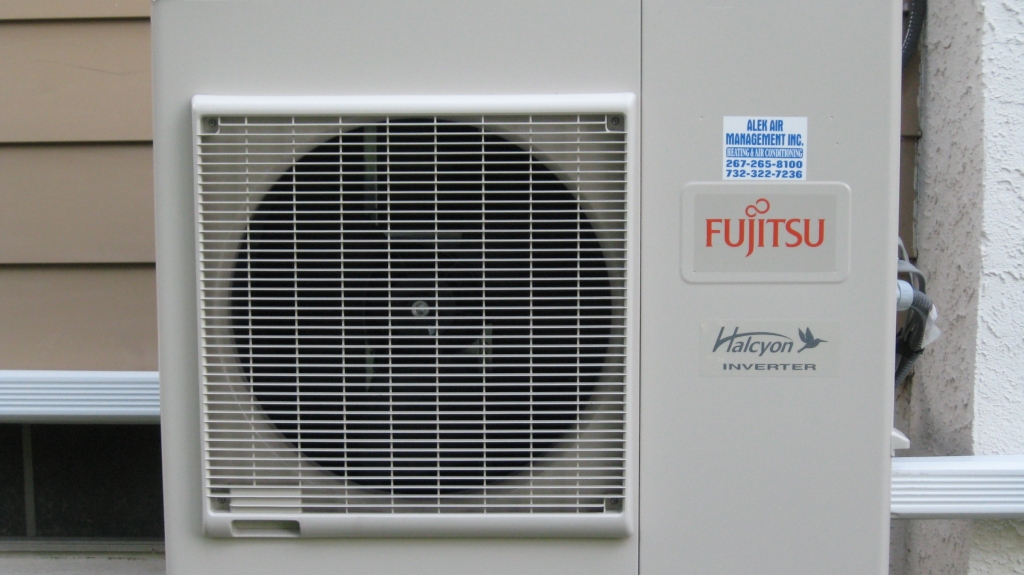
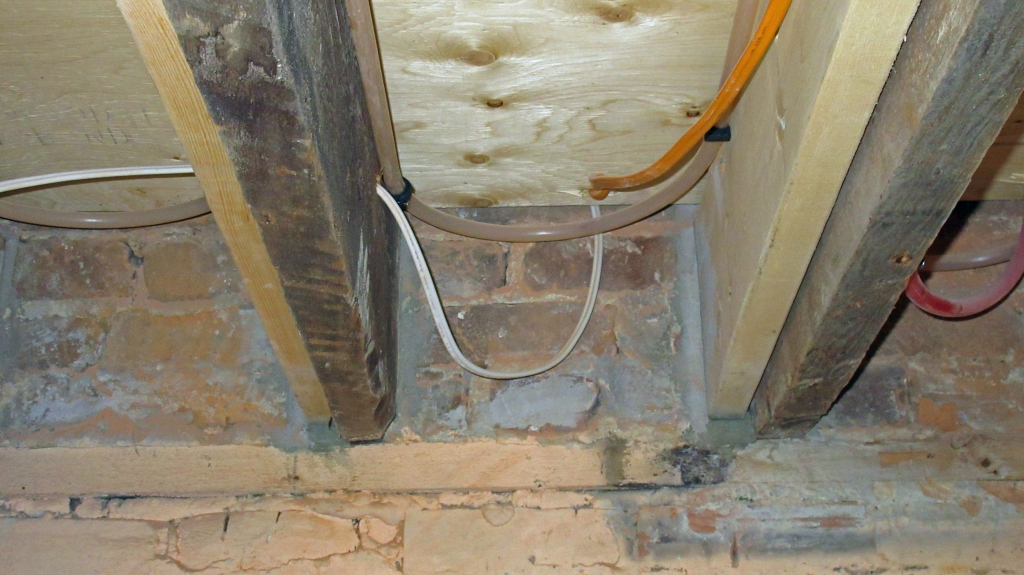
Together with our mechanical designer, we’ve designed a great HVAC system for our Bickford Park project. We’ve decked out this Toronto home with in-floor heating, a tiny combination boiler, and a fully ducted air source heat pump (ASHP) air conditioning system, often called a “ductless mini split”. Our clients are happy with the upgrades, and so are we! We are huge fans of hydronic in-floor heating, especially when the PEX piping can be installed in-between existing floor joints. We love consistent heating and cooling systems, as opposed to huge blasts of hot or cold air. In-floor heating, as well as the ASHP we’ve used for this home’s air conditioning system, do just that – they cool or heat the overall space in a slow, uniform way, so the entire house feels comfortable, instead of drafty and patchy. Our blower door test helped us achieve a pre-drywall air leakage rate of only 4 ACH – better than many new suburban homes, which are usually about 5 ACH. But, keep in mind, the basement is still completely un-renovated! So that’s 4 ACH with a whole side of the house exposed to the elements – that’s impressively energy efficient. With this efficiency, our heating and cooling systems don’t have to do much work. A small, natural gas combination boiler about the size of a backpack controls the temperature for both the in-floor heating as well as water for domestic use. A 2-tonne Fujitsu air-to-air heat pump which handles the cooling is nearly half the size of a typical building code standard system. The cooling system is tied to the HRV duct work, just like in Tom and Christine’s house. Because of the tight envelope, the house requires mechanical ventilation; the HRV (Heat Recovery Ventilator) gets rid of stale air, but only after transferring the outgoing air’s heat and moisture to fresh incoming air. This new conditioned air is then circulated around the house. This whole process is more efficient than, say, opening a window, because the process of heating and humidifying that fresh, unconditioned window air has to begin from scratch, and the old, conditioned air is dumped outside along with its valuable heat and moisture. The HRV uses a cross flow heat exchanger to transfer heat to the fresh air: the outgoing, stale air and the incoming, fresh air never touch, but pass so close to each other that heat is transferred to the incoming air. Our air conditioning system is fully ducted, however done a little inventively! We’ve decided to piggy-back onto our HRV ductwork to duct our ductless mini-split. Now, say that 5 times fast!Bickford’s SystemsGo To Project Page


A Ducted Ductless Mini-Split
A “ductless mini-split” or air source heat pump is an ultra-efficient condenser located on the exterior. Lines of coolant connected to the condenser run up the exterior face of the building to “heads” inside the house. These “heads” suck up hot air and, using coolant from the condenser, cool the air and throw it back into the room. What’s great about ductless mini-splits is that they require much less energy than a typical forced air system. They work on a “slow and steady” principle, so the house maintains a much more consistent temperature than big windy AC units. It should be thought of as something that stays on, working lightly and slowly in the background, instead of a forced air AC unit that works on overdrive every time you turn it on.
We’ve decided to tie the mini split into the ductwork. Since it works slowly and steadily from singular heads, if a house has many separate rooms, many heads would be required to fully cool down the entire house – but this can become expensive. By tying the head it into our HRV ductwork via a manifold, we can circulate the air throughout the entire house in a more consistent manner. And that’s how you get a fully ducted, ductless-mini split!
All that’s left to do in this house is finish off the drywall, interiors, appliances and fixtures, and move this family in!
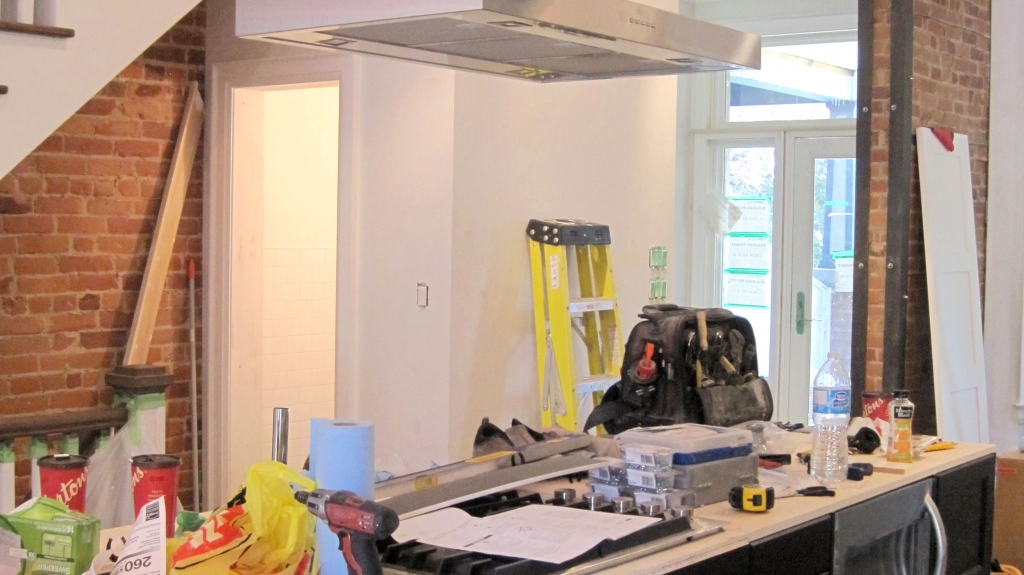
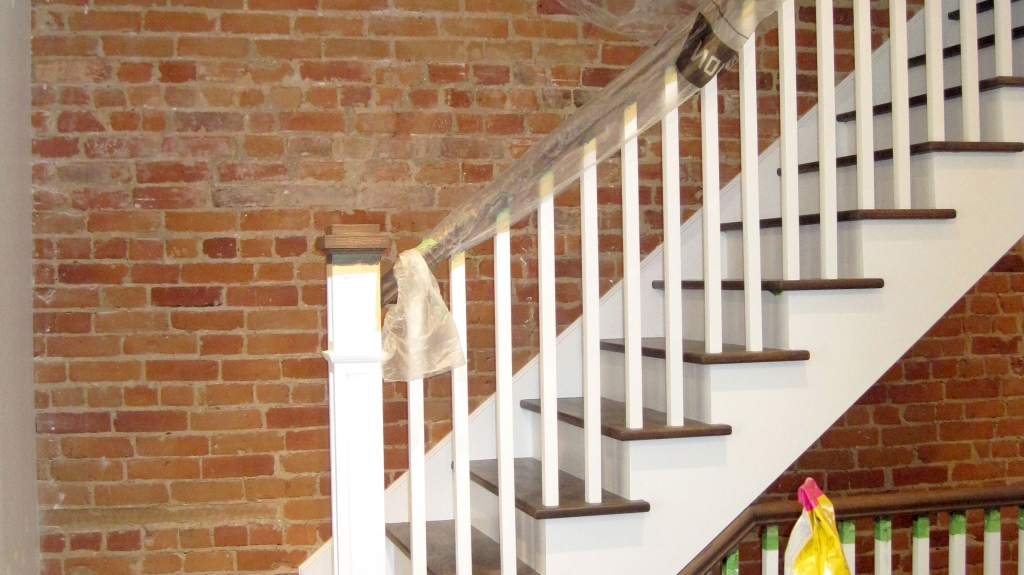
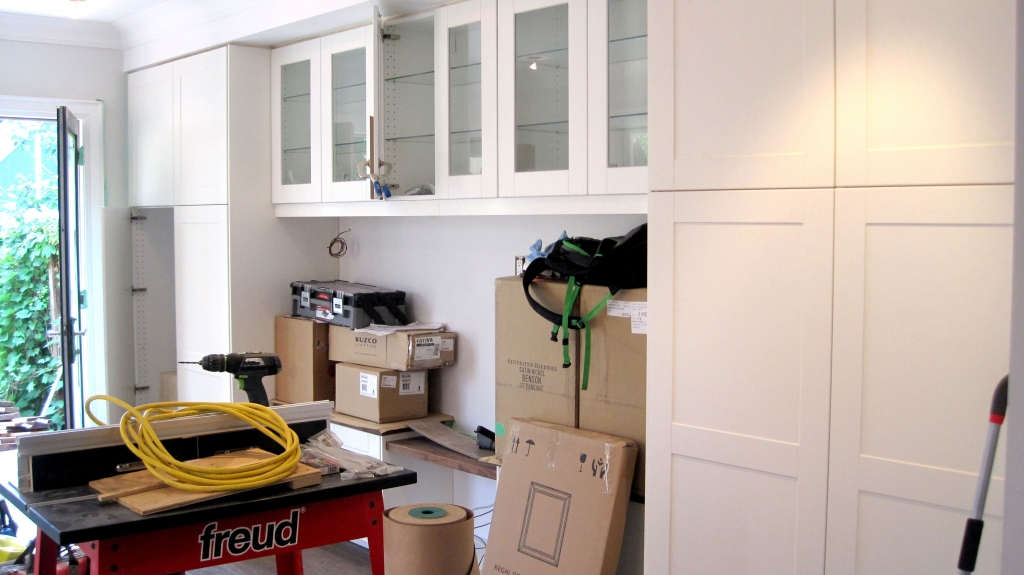
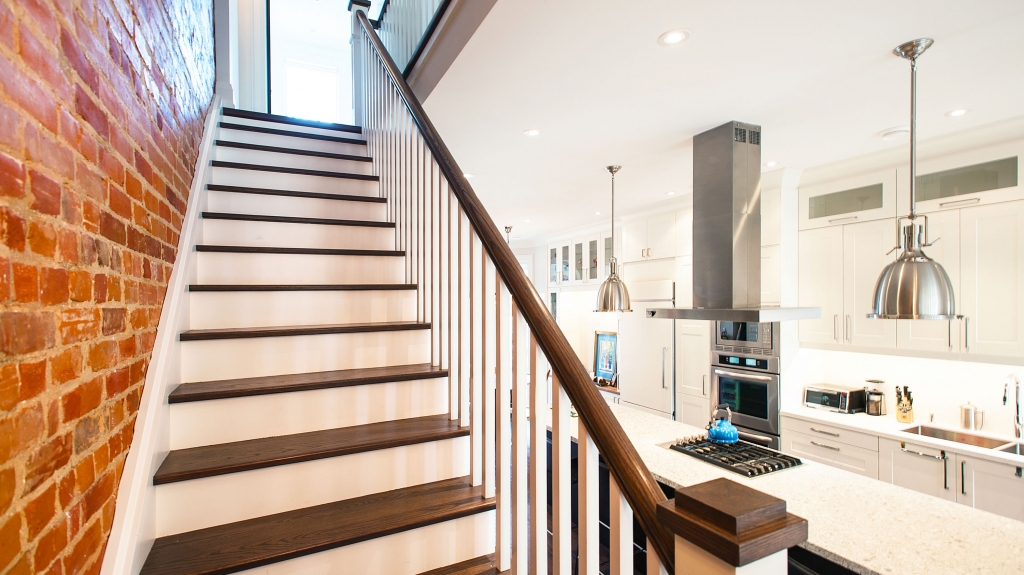
Isn’t it funny how a coat of paint seems to change a space more than the hundreds of hours of work that went in behind that painted wall? Or that you can make a kitchen look brand new by replacing kitchen counters or laminate flooring, while leaving the structure, insulation and HVAC untouched? Hopefully these blog posts have given some insight into the nitty gritty bits of architecture, the phases of project construction that aren’t quite as glamourous as that final IKEA run or last coat of paint, but are absolutely critical to a good, long-lasting major renovation. But now, the time has come to decide on paint chips, floors, countertops and finishes. And though we all understand that there’s a lot more to a major, energy efficient renovation than just interiors, finally getting to choose those stylistic elements sure is satisfying. So now, without further ado, we’re finally ready to start working on Bickford Park’s decor and interiors. Yes! Our clients wanted this semi-detached Toronto house richly textured and beautifully detailed, with classic art deco elements and decor. Recalling their client homework, their dream home was dramatic and artistic, where every room had unique flair. They were specifically interested in nice, clean baseboards, crown moldings, and warm walnut floors, and trusted us to choose all the tiles, finishes and colours to fit with their warm aesthetic. We opted for some Solares standards, like white IKEA cabinetry, and added some unique features we knew our clients would love, like custom stone countertops in the kitchen, and we made sure every bathroom had its own individual palette. We also ensured that there was plenty of built-in storage and closet space in every room, to make a tidy house easy to keep. One feature that was really special to our client was the exposed brick wall that our feature stair wound up on every floor. Our client was adamant to keep it exposed, which is a hit in insulation and air tightness. We warned them that their neighbor’s sounds, smells, heat, and air could all transfer through this shared brick wall – if their neighbors like loud parties and aromatic foods, our clients might soon find out! If insulated and covered over, the house would be quieter and generally more private. But as a cool, beautiful, and impressive feature in the space, it was deemed definitely worth the hit in air tightness and potential neighborly disruptions. We’re as excited as our clients to see this project complete. If only we could all move in alongside them!White Walls & Exposed BrickGo To Project Page
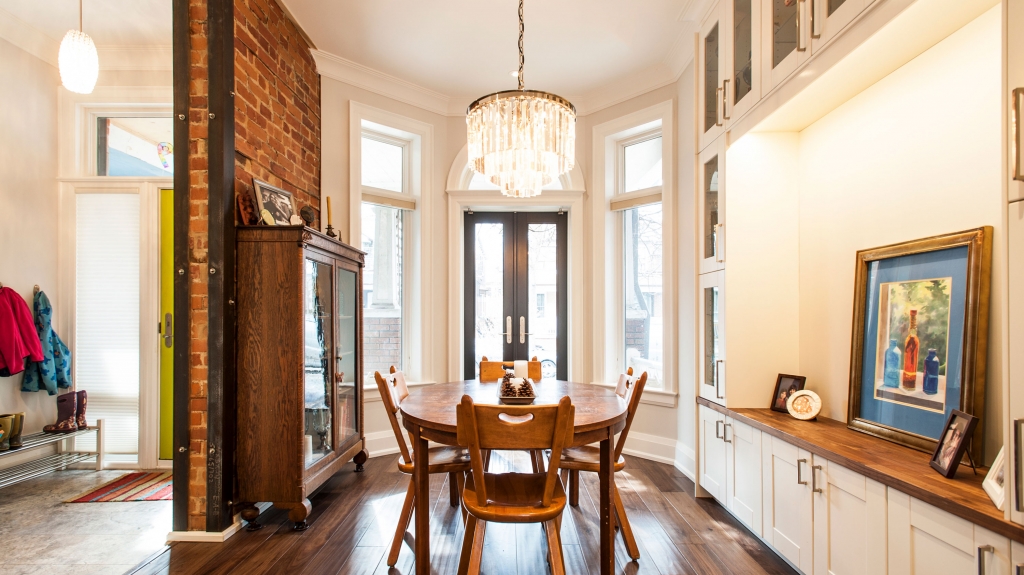
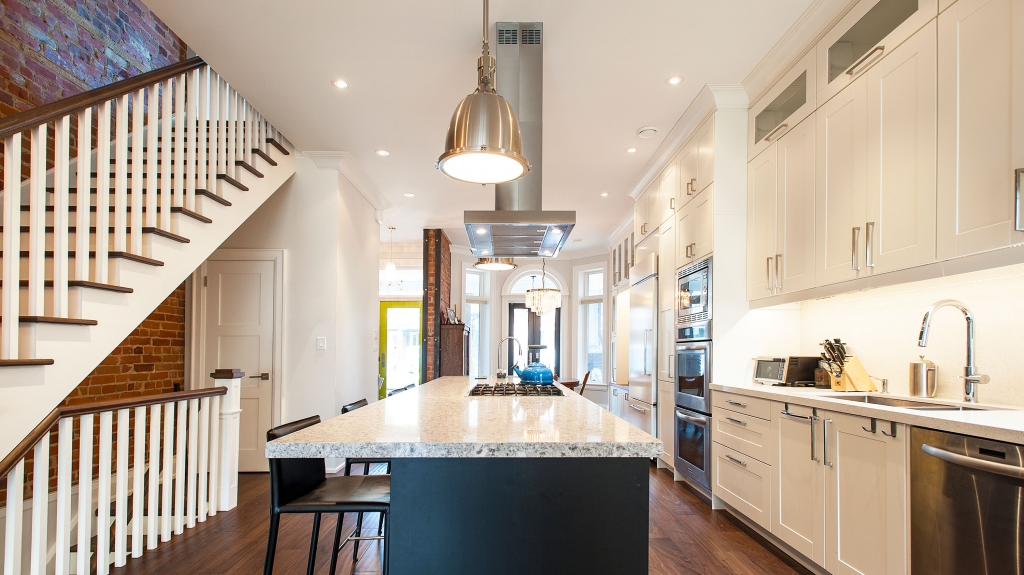
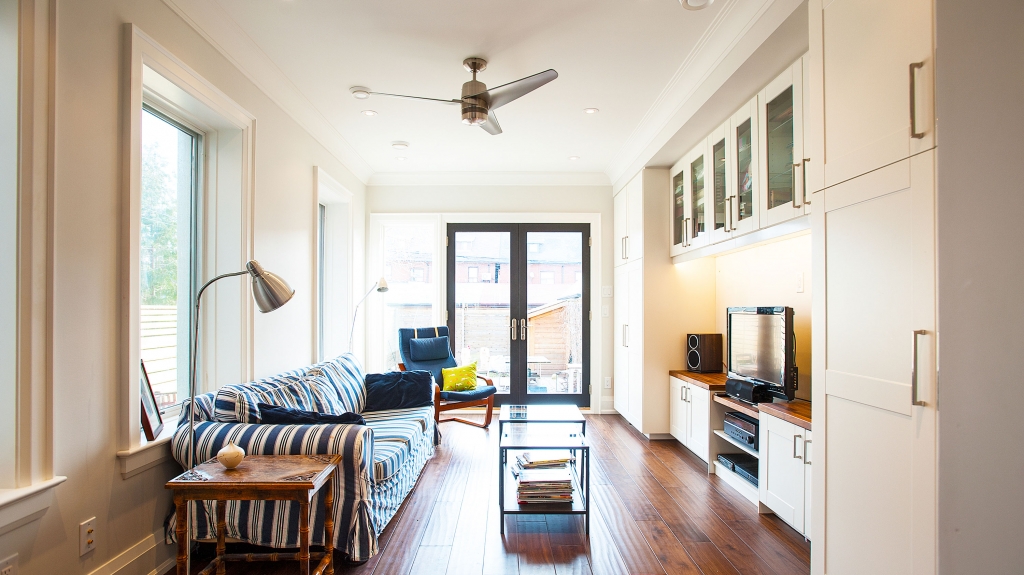
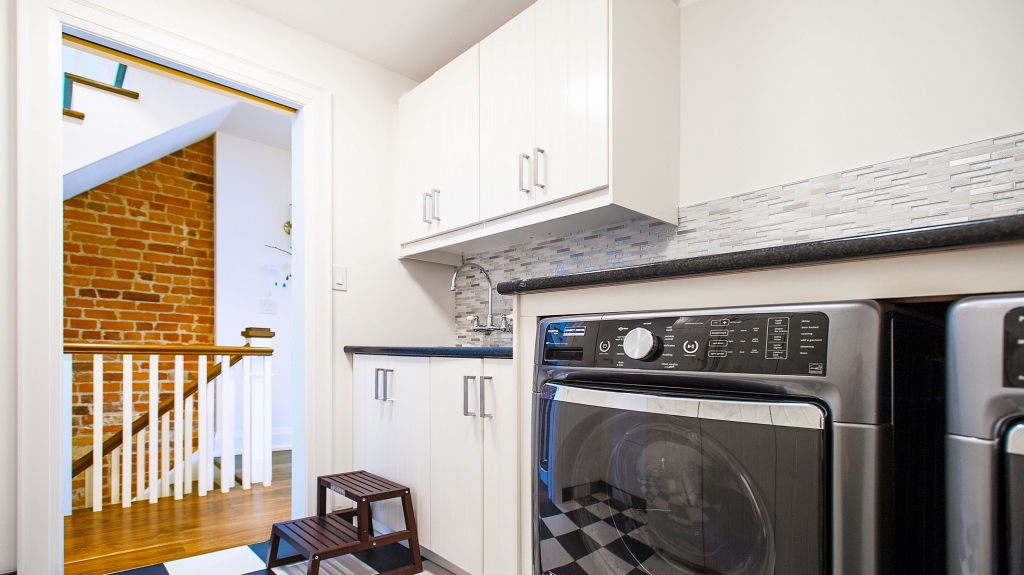
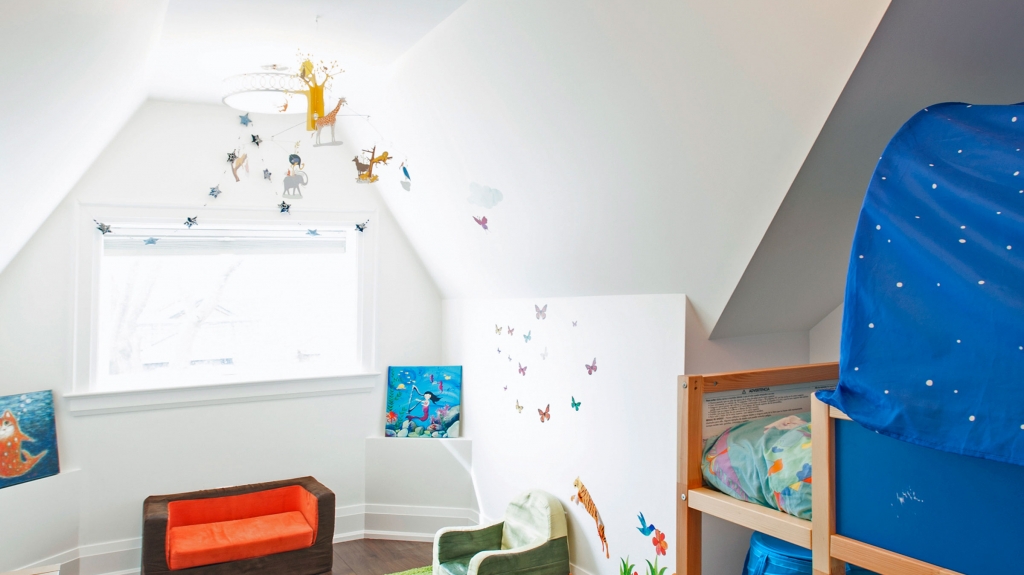
The paint has dried, the paintings are hung, the bookshelves filled, and the furniture in place. Bickford Park is complete! Our clients have moved in and they love their new and efficient home. We love this house too: it’s the perfect combination of clean, open, and elegant, yet, friendly, warm, and welcoming. One of the things our clients love the most is the amount of doors leading outside – there are four on the main floor! The front door, painted a bright lime green, gives the house a look of whimsy from the sidewalk; a set of French doors open up to the dreamy front porch and garden; a “side” door off the kitchen, leads to the back barbeque; and at the very back of the house, a set of large glass doors opens up to the spacious backyard, flooding the living room with light and air. This connectivity enables the front garden and the backyard to become a cohesive part of the main floor. Inside, the dining room table is tucked in the front bay overlooking the porch and garden. Past this, a large kitchen island with a central exhaust hood creates a cool and industrial feel and splits the dining room from the living room. The second floor front room has been filled with musical instruments, toys, and books. The sun shines through the western bay window and the glass French doors provide some privacy from the second floor hallway and stairs, so the kids can practice piano and ukulele – or the parents can get some work done in the office space – in peace. The serene master bedroom includes an ensuite bathroom, in blue-grey and tile, and a big east-facing window. And who wouldn’t want a laundry room like theirs? Off the second floor hallway, the spacious room has vintage checkered floors and tons of counter and storage space, so everyone can pitch in on the chores. The kids’ rooms on the top floor are sleepy and magical, with slanting ceiling, canopy beds, and soft streaming light through the north and west windows. Tons of open space means the kids can scatter the floor with toys and play together or separately in their own bedrooms.The Finished Bickford Park!Go To Project Page
Final Efficiency Stats
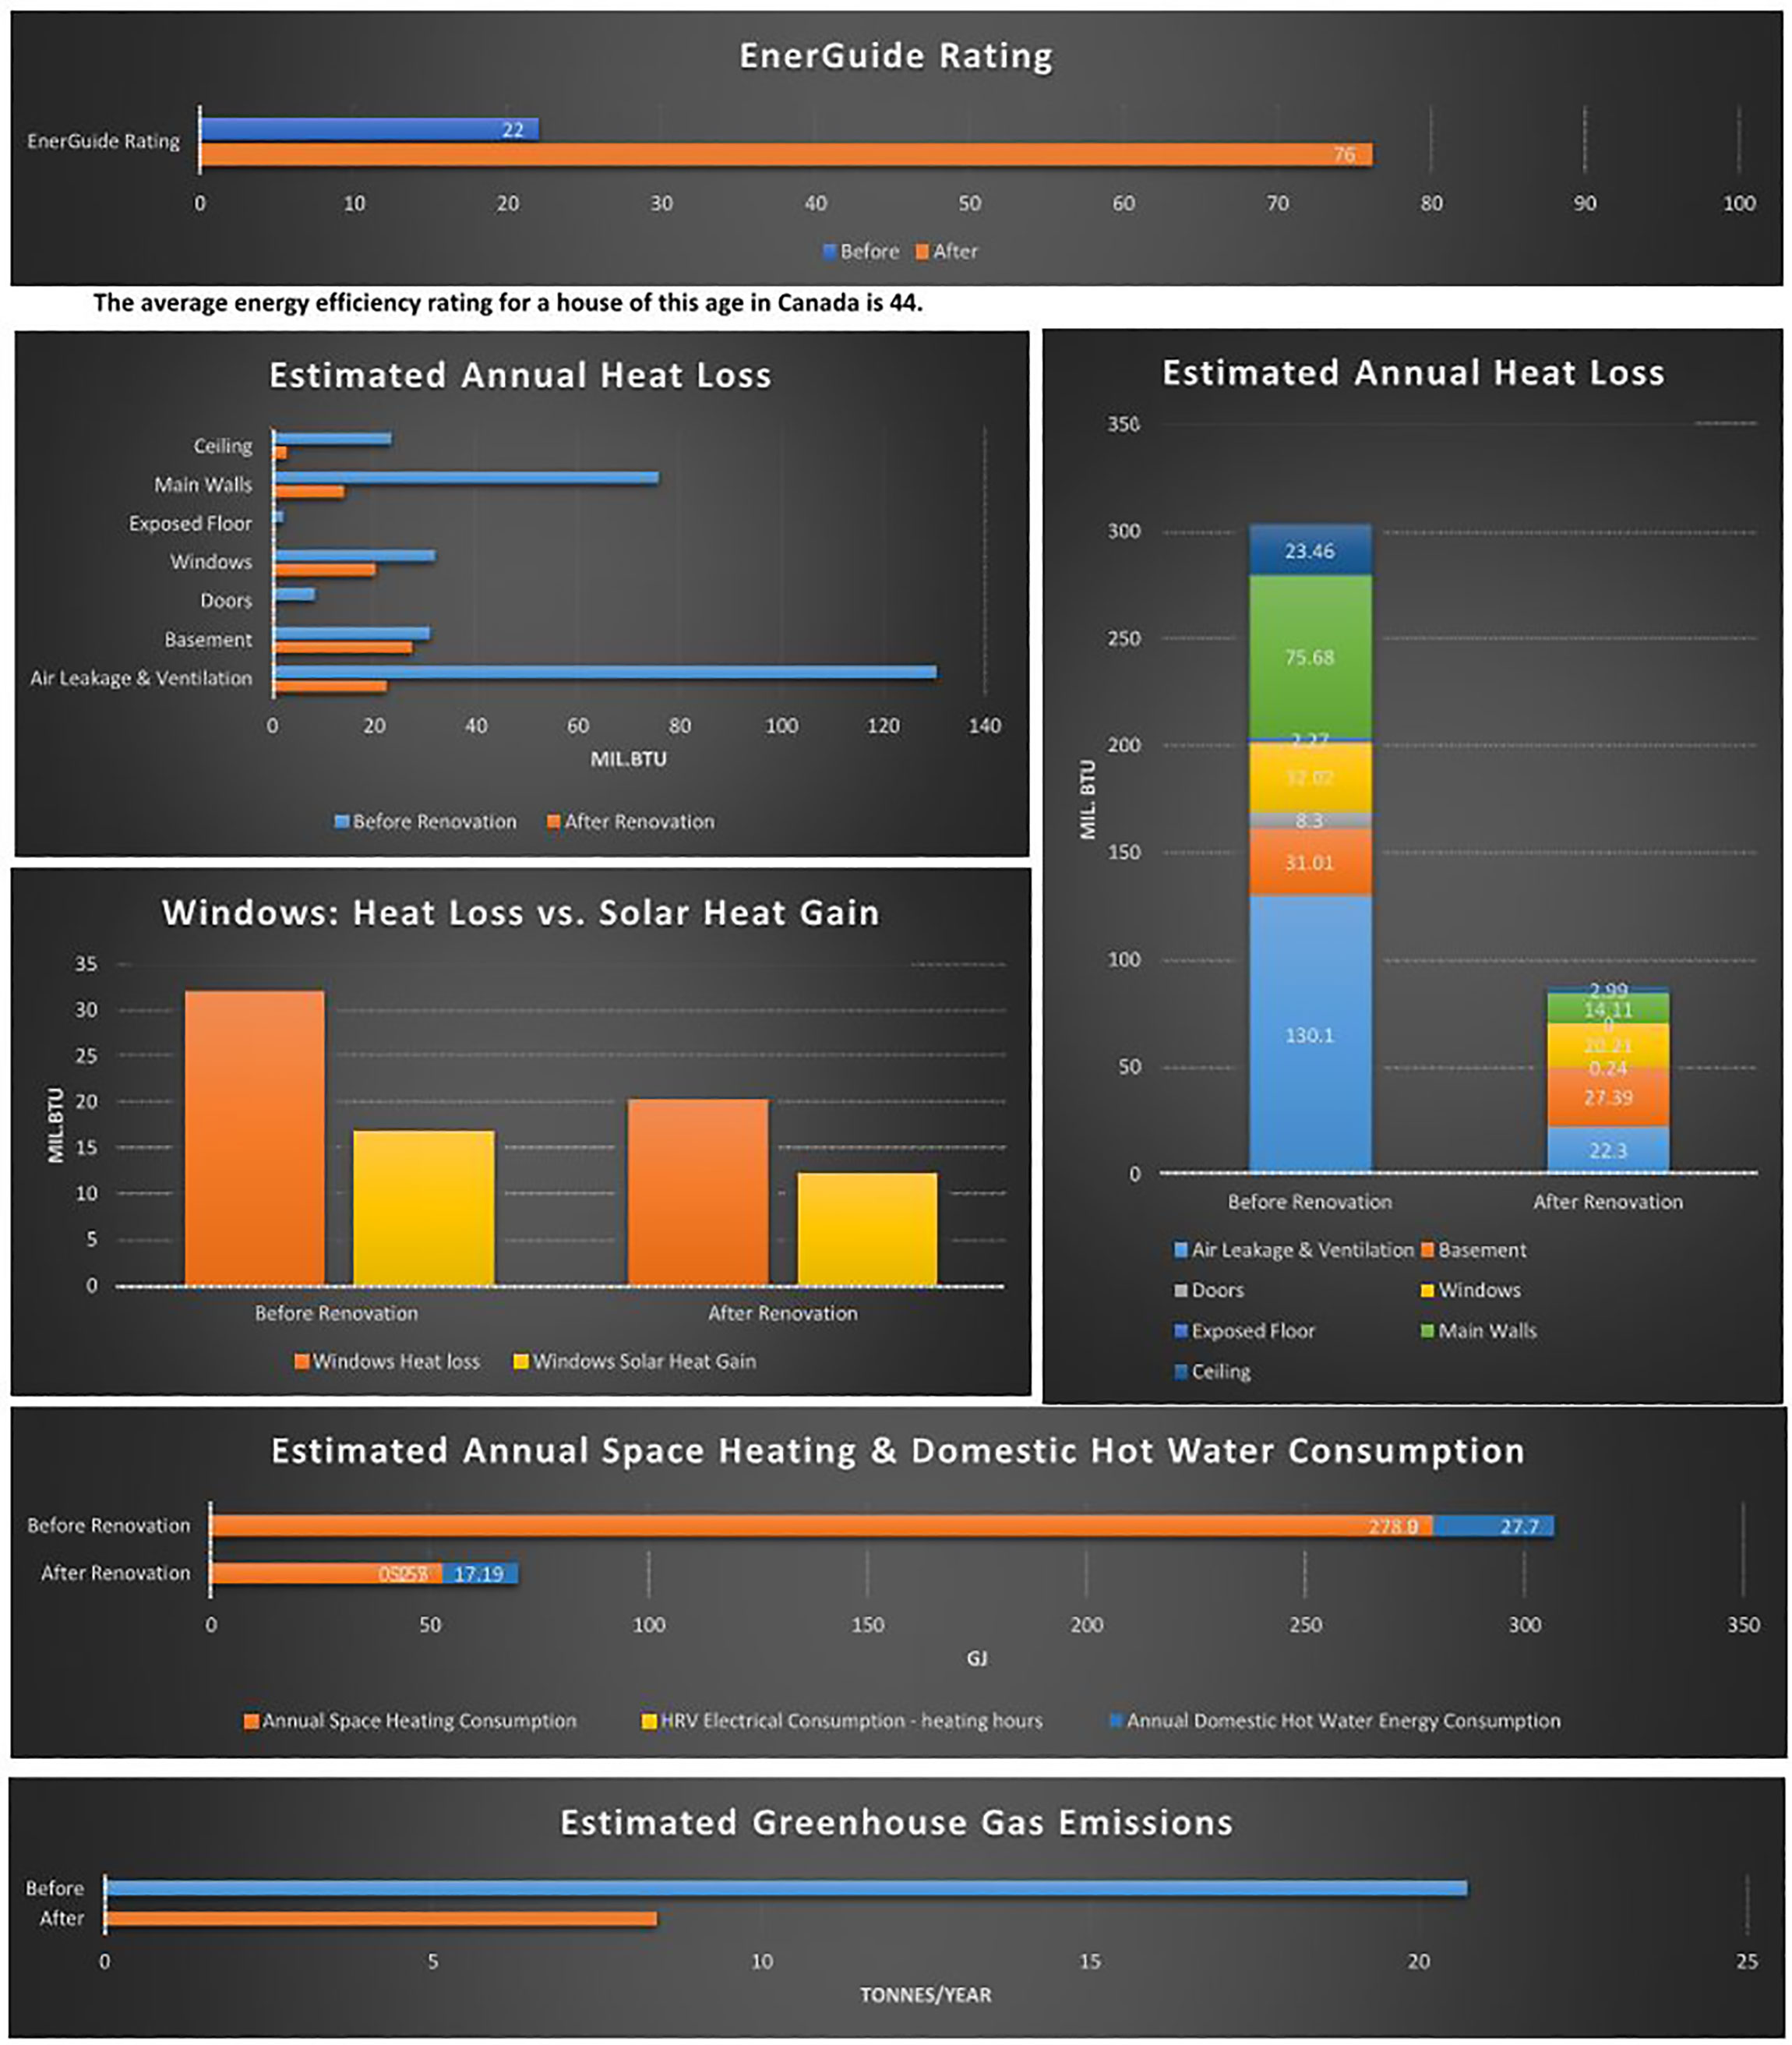
Sure, the place looks like a dream, but the cold hard stats prove that this place is dead serious when it comes to efficiency. With a 71% reduction in Annual Heat Loss, and an 81% reduction in space heating, the place is comfortable and warm – or cool! – with little effort and waste. The final air leakage rate is over 3 times more air-tight than before renovations, at 4.45ACH@50Pa. That’s a shocking difference from the previous 14.31 ACG@50Pa! And the new renovation boasts a near 15-tonne reduction in annual greenhouse gas emissions – that’s equivalent to what 5 Honda Civics combined produce in one year!
The Energuide rating began at 22, the lowest Solares had ever seen! Now the rating has soared to 76, even without any basement renovations. Remember, the home’s basement is still completely unfinished, which makes the home’s “final” stats that much more impressive. Once our clients insulate and air seal the basement in a few years, these impressive ratings will only get better!
Thanks to our very own Melodie Coneybeare, the home was lovingly and exceptionally designed. Working closely with the clients, Melodie was able to design a home that suits their needs, goals and budget. And we couldn’t have seen this project through without our awesome General Contractor, Jesse Hayes, who slaved painstakingly over every little detail to make this house perfect. Thank you for all your hard work, Jesse!
And finally, we want to thank our clients who were so great to work with. It’s such a joy to see them happily living in their new Solares home.
- + Intro
- Intro to Bickford Park House
Bickford Park House is a contemporary renovation of a classic semi-detached Victorian house in downtown Toronto.
This beautiful house hits all the marks in Toronto real-estate. Nestled in central-west Toronto, the residential tree-lined street it faces is quiet and friendly. The building backs onto a laneway in the east, which acts as bike parking for the family and car parking for guests. This neighborhood has everything a Torontonian would need, all within walking distance. It sits close to TTC stations and bus stops, as well as countless parks, schools, stores, and restaurants. The central location and beautiful brick exterior make this house a total keeper, though the layout and interiors needed updating to better suit our clients’ evolving needs.
Our clients have been living in this house for 20 years, but had been previously renting out portions of it as apartment units and individual rooms. Now that they have their own family, they want to consolidate the home into a single family dwelling.
Go To Project Page


 The Goals
We decided together to gut the inside and rejuvenate the interior, making it a more contemporary, open-concept space where they can work, entertain, and enjoy spending time together. Keeping the overall classic look and feel of the house was important as well: our clients already love the house, so we wanted to make sure any drastic changes only strengthen their sentiments. They particularly love the beautiful, old Wisteria vine that crawls up the front porch, which they wanted to make sure was preserved through the entire renovation process. Our mission was to modernize the interiors to suit their needs as a single family (they love to entertain and cook!) without losing the home’s charm, and update the house into a more energy-efficient and environmentally friendly building.
We’ll be tracking the demolition and renovation over the next few months. Follow along as we expand the backyard space, rehabilitate the old load-bearing brick, strengthen the structure, and hold ourselves back from finishing the basement! We’re eager to turn this multi-unit Toronto house into an idyllic and energy-efficient family home, so stay tuned for more updates from this reno!
- + Design
- Bickford Park’s New Floor Plan
The Bickford Park house is classically Torontonian: a Victorian brick semi-detached house in a central location with a quiet and friendly residential feel. This house sits worlds apart from the new glass condos and high-rises popping up on the Toronto horizon.
But this house had other distinctly Torontonian qualities that weren’t quite as desirable. Before our clients decided on a major reno, the aging brickwork held separate apartment units and an old poorly built rear addition that ate into backyard space. Solares’ retrofit is a much needed modernization on a classic building – we will be consolidating the many units into one family home while making the building as energy efficient and air-tight as possible.
In the design process, one of the major moves was to remove the rear addition completely. This makes the project very unique – one doesn’t typically remove square footage during a renovation! But removing the addition meant more backyard space and a slightly lower construction cost, and our new design gave our clients more than enough space for everything they wanted without the addition.
A challenge we were faced with was keeping the basement unfinished. As a group, we decided that leaving the basement as a second phase would free up the budget for the main renovation. This became a tricky technical issue, as we didn’t want to do any work that would later have to be undone in order to underpin and finish the basement.
Our clients wanted to preserve the existing aesthetic of the home. So for the exterior, they wanted a rejuvenation, as opposed to a jarring redesign, so our plan was to keep as much of the exterior as intact as possible. We did, however, find some crumbling brickwork during demolition that needed major attention, but we’ll talk about that more in our next post!
Go To Project Page
Now the Fun: Floor Plans!The main floor, totally open-concept, is the heart of the house: with a front dining area, central kitchen, and large rear living area. The lively family wanted big and open spaces to host huge dinner gatherings with friends and family. The living area at the back of the house leads out to a newer, bigger backyard, thanks to the removal of the old rear addition. The main stair was rebuilt and reversed to enable better flow between all the levels. Tucked out of the way on the basement stair landing is a small 2-piece main-floor washroom, a much coveted feature in any Toronto home.
On the second floor, the master suite with en-suite bathroom is located at the back of the house, with a large east-facing window overlooking the backyard. This level has ample space for two home offices, as both parents often work from home. If needed, one (or both) of these rooms could be converted to bedrooms in later years. Between the two offices is an awesome laundry room with tons of storage and ample space for air-drying clothes.
The third floor attic is the kids’ domain. The steeply sloped ceilings and asymmetric windows create distinct bedrooms, and a cozy, shared bathroom. We toyed with the idea of putting in skylights but our clients had recently replaced their roofing with period-appropriate slate shingles.
This house is on its way to becoming a home. We’ve seen the “before” photos, but I’m itching to see the “after” pictures!
- + Structure
- Dissolving Bricks in Bickford Park
With the interior of our Bickford Park project stripped clean, our construction could begin nearly from scratch on this beautiful Victorian house. There were a few technical challenges that set this project apart from some of our other, more straightforward renovation jobs, but our general contractor, Jesse Hayes, helped us through the gutting and rebuilding process. A good friend of our clients, he had just finished a full gut-reno on his own home. Having had plenty of recent practice, our clients were confident in his services!
The demolition process went smoothly, and felt like a refreshing cleanse for everyone involved – we purged the interior, ripped off the back addition, and removed all evidence of the aging work previously done on the house. Man, did it feel good.
But then we met our first roadblock: crumbling brickwork.
Go To Project Page


 The Bricks
On our very first visit to the house, at the start of the design process, we realized that the brick on the east wall of the house had been plastered over. At that time we immediately suspected something wasn’t right with the bricks. Generally one doesn’t plaster, paint, or cover perfectly good brick for no reason – especially load-bearing walls.
Solid brick makes a great, durable exterior wall, as bricks are designed to be able to withstand weather and precipitation, and dry off with minimal damage, like an adobe wall. In the early days of brick houses, wet brick would dry with help from the heat of escaping interior air, mainly due to poor insulation and air sealing. However, in better insulated houses with less escaping heat, bricks need to be kept as dry as possible. Badly draining eaves troughs and leaky downspouts can be the death of a brick wall. A saturated, wet brick that can’t dry out can become damaged, crumble and dissolve, or even freeze solid during winter months and burst. Yikes.
So now you understand why we were nervous when we saw the plaster: we were worried these bricks could be badly damaged from years of saturation. And, unfortunately, it turned out we were right – when we uncovered the brick from the inside, it was so damaged that it dissolved into dust at the touch.
From the ground up 30 inches, both brick wythes (the interior and the exterior brick layers) along the entire east side of the house had to be replaced, a hugely expensive, painstaking, and (alas!) necessary undertaking. The entire wall then needed to be protected from future degradation by re-cladding and insulating, but that’s a story for the next blog post.
In the end, we suspect someone probably sandblasted the bricks to “clean” them back in the day, and, upon realizing they were falling apart, attempted to hide the evidence with plaster. But quick-fix solutions like plaster and paint don’t fix broken bricks.
Floors and Shear WallsAfter the brick was replaced with block, we then “sistered” every floor joist, which means we married each existing structural member with a new one. The floor joists were sagging and bowed from age, making the floor out of level from front to back by a few inches. By sistering every joist, we were able to level and strengthen the entire floor. Sistering is a huge undertaking – the entire sub-floor must be removed simply to gain access to the wooden joists! But it was worth it for a nearly brand-new, much stronger and more durable floor.
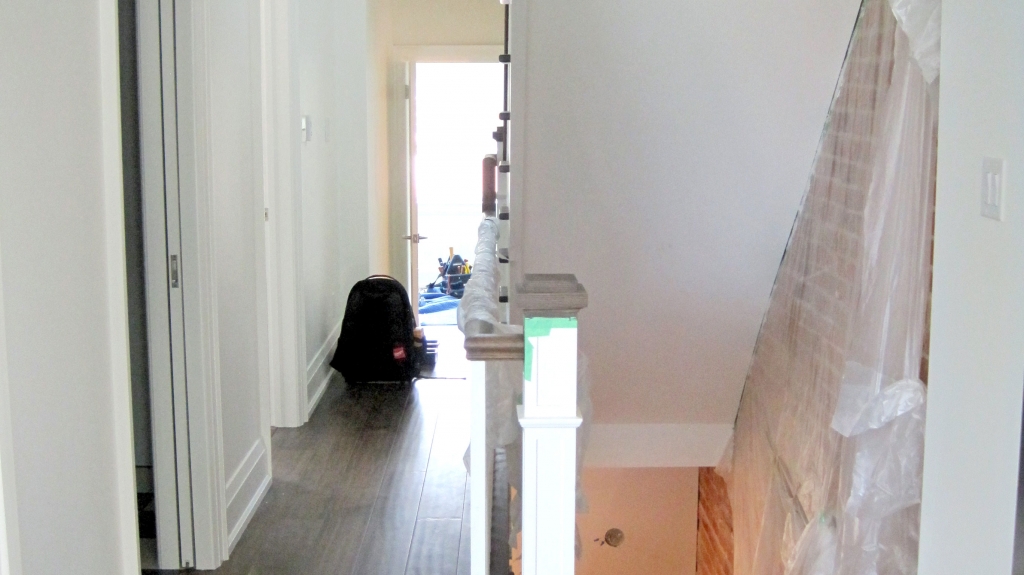
Because the main floor was largely open concept, we installed shear walls to keep the large room on the main floor braced. These small, 4ft long, super reinforced wood-frame walls are sheathed on both sides with plywood and are connected through all three floors, from the footing in the basement all the way up to the third floor. These walls help resist lateral (side-to-side) loads. While a house might not fall down without these shear walls, they help prevent other problems which could occur in the structure, like cracks in the drywall or shakes and tremors in the walls. The first floor shear walls flank the stair, which integrates them seamlessly into the design of the house.
Our clients were adamant that finishing the basement would be a second phase in order to preserve budget. That being said, we still had to plan for the future by ensuring all structural work done in the basement (new footings for the shear walls) be done 3’ below the existing slab level. That way, in the future, our clients can underpin without having to redo the new structural work.
In short, we did everything we could possibly do to this house, aside from ripping it out and starting from scratch! Completely demolishing and rebuilding might have even been easier, but there were plenty of reasons why a total demo was not possible:
Firstly, ripping down a semi-detached house is a very complicated process, and should only be done out of absolute necessity. Secondly, the character and style of a Victorian house is surprisingly hard to mimic – new, Victorian-esque houses simply don’t look like the originals. And thirdly, our clients simply wanted to preserve the original character of their home – they wanted a rejuvenated home, not a new one.
Keep checking in with us as we build back this Bickford Park house, one brick and joist at a time!


- + Envelope
- EIFS, Bricks & Blower Door Tests
Another project, another envelope! Bickford Park has been decked out with insulation, cladding, roofing and drywall, and we’ve added tons of windows and doors to brighten the space up.
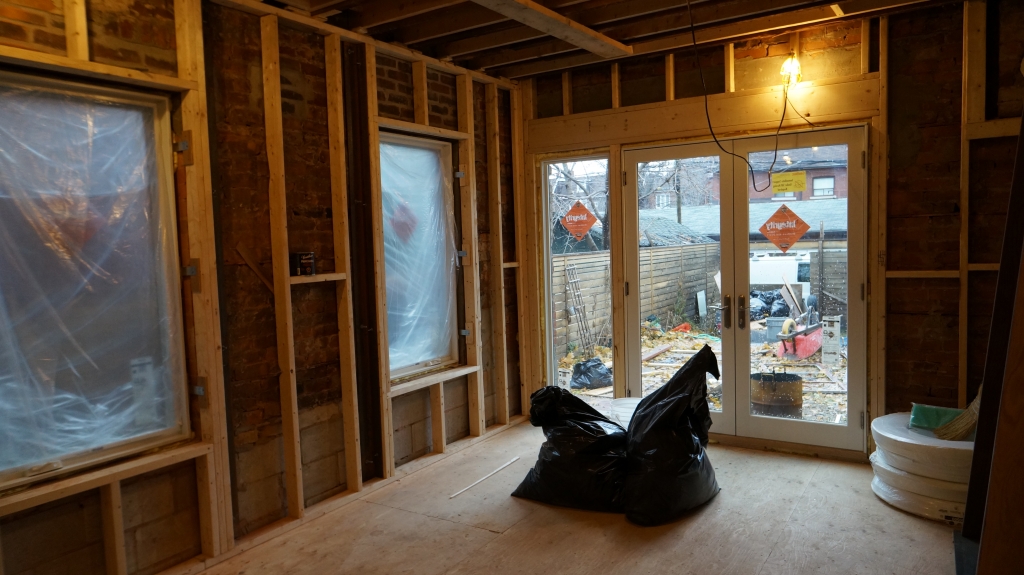
We opted for spray foam insulation in this project, a more standard approach than other projects of ours. This spray foam is installed directly to the inside face of the load-bearing walls and between the studs of a new wood interior wall. This new stud wall houses new electrical and plumbing.
Ideally a wood stud wall is set away from the brick wall to allow a continuous layer of insulation behind it. Because the house had width to spare, we made this gap 2-inch, double what we typically do. Usually homeowners are wary of losing any floor space, but our clients were fine with losing the extra inch in order to increase their overall comfort. We installed 4 inches of spray foam between and behind the studs which gave us an R25 wall.
The remaining 1.5 inches of space between the spray foam and the drywall acts a chase where plumbing and electrical wiring can be installed without being encased in foam. Encasing piping and electrical units in foam makes it very difficult to locate and fix problems, if they ever occur.
The EIFS on the east and rear walls of the home added both cost and additional insulation to this project. EIFS (Exterior Insulating Facade System) is an exterior insulation method, where the house is covered in EPS foam that is then coated with a thin layer of stucco. It is not a hugely durable house exterior, like brick or masonry, and has less aesthetic flair. However, it was necessary because this home’s vulnerable bricks needed protection.
The company we used was Durock, one of the larger, more well-known EIFS manufacturers. Durock makes an EPS board with a built-in drainage layer called Puccs, which we used with great results. First, a primer stucco coat is applied onto the brick to seal and protect the wall, and then goes the Puccs EPS foam. Mesh is then fastened to the foam onto which the stucco layers are applied.
Go To Project Page


 The Exterior
We installed spray foam to the underside of the roof sheathing, as we had to preserve the existing roofing by all measures – our clients had just installed beautiful slate shingles a few years ago, a beneficial albeit costly undertaking.
A company called Marvin supplied our windows and doors. Our clients chose double-glazed, wood-framed windows, which are aluminum capped on the exterior to protect the wood. They were attracted to the tactility and warmth of the wood. We added tons of windows all over the exterior, as many as building code, existing structure and our energy efficiency goals would allow. Where a well-insulated wall is R25, a great window might be R5. But windows are almost always worth the hit – they let in natural light and ventilation, open up the space, and are just plain pretty. Old Victorian houses are typically dark with very small windows – glass was expensive, and with insulation being nearly nonexistent back then, the less holes for air and heat to escape the better. Thankfully, we now have the power to insulate and add more windows to a previously dark and enclosed space.
Finally, we replaced the damaged bricks in the front load-bearing wall and preserved the ancient Wisteria Vine on the front facade, just as our clients wished! Then it was time to test our work.
Pre-Drywall Blower Door TestsA word of Solares advice: Always test your envelope for leaks and problems before putting the drywall up. We believe that the air barrier is the most important part of the envelope, so we do blower door tests to verify its performance. If your air barrier leaks, no matter how much you insulate, your house will not perform well. A nice warm parka with the zipper wide open doesn’t do much good! These tests are unique to the Solares process – most people just assume if their envelope was designed properly it will work properly, but we know not to assume anything!
We used BlueGreen Group to test the spray foam before drywall was installed. This allowed us to locate over 70 microleaks and seal them up! The first test came in at 7.5 ACH (air changes per hour) which is quite high, but remember, the basement remains unfinished at this point and is leaky like a sieve! With all the micro-leaks sealed up and the main house finished we should be closer to 5 ACH. Once the basement is finished in a couple years, we should be closer to 3 or 2 ACH.
Blue Green used an infrared camera to locate all the leaks. IR cameras can only be used in the winter because they pick up the temperature differential between the warm interior and cold exterior. Cool, huh? (Pun intended!)
Next time we’ll talk about what goes in that space between the spray foam and the drywall, as electrical systems, plumbing, and heating gets installed!


- + Systems
- Bickford’s Systems
Together with our mechanical designer, we’ve designed a great HVAC system for our Bickford Park project. We’ve decked out this Toronto home with in-floor heating, a tiny combination boiler, and a fully ducted air source heat pump (ASHP) air conditioning system, often called a “ductless mini split”. Our clients are happy with the upgrades, and so are we!
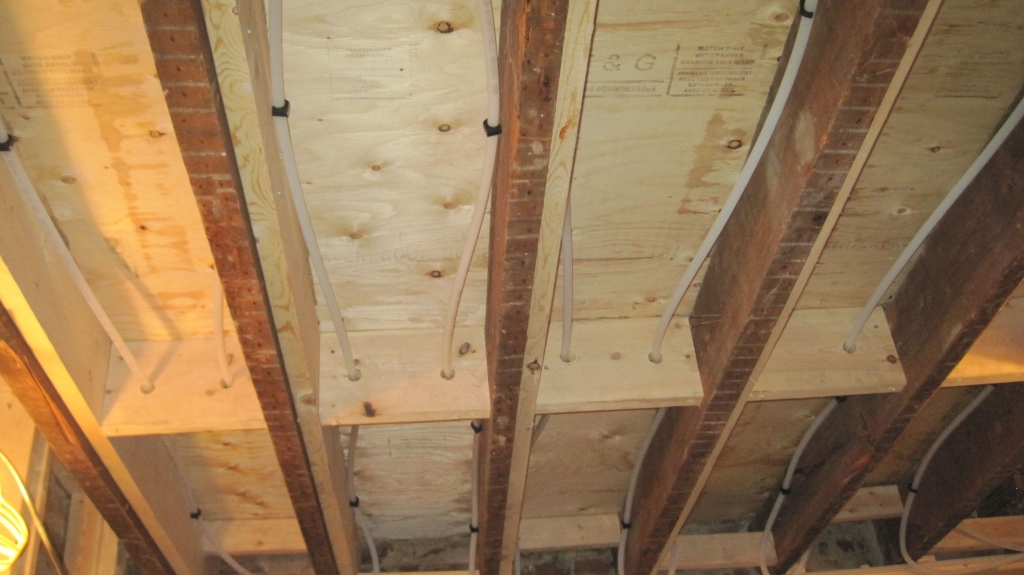
We are huge fans of hydronic in-floor heating, especially when the PEX piping can be installed in-between existing floor joints. We love consistent heating and cooling systems, as opposed to huge blasts of hot or cold air. In-floor heating, as well as the ASHP we’ve used for this home’s air conditioning system, do just that – they cool or heat the overall space in a slow, uniform way, so the entire house feels comfortable, instead of drafty and patchy.
Our blower door test helped us achieve a pre-drywall air leakage rate of only 4 ACH – better than many new suburban homes, which are usually about 5 ACH. But, keep in mind, the basement is still completely un-renovated! So that’s 4 ACH with a whole side of the house exposed to the elements – that’s impressively energy efficient. With this efficiency, our heating and cooling systems don’t have to do much work. A small, natural gas combination boiler about the size of a backpack controls the temperature for both the in-floor heating as well as water for domestic use.
A 2-tonne Fujitsu air-to-air heat pump which handles the cooling is nearly half the size of a typical building code standard system. The cooling system is tied to the HRV duct work, just like in Tom and Christine’s house. Because of the tight envelope, the house requires mechanical ventilation; the HRV (Heat Recovery Ventilator) gets rid of stale air, but only after transferring the outgoing air’s heat and moisture to fresh incoming air. This new conditioned air is then circulated around the house. This whole process is more efficient than, say, opening a window, because the process of heating and humidifying that fresh, unconditioned window air has to begin from scratch, and the old, conditioned air is dumped outside along with its valuable heat and moisture. The HRV uses a cross flow heat exchanger to transfer heat to the fresh air: the outgoing, stale air and the incoming, fresh air never touch, but pass so close to each other that heat is transferred to the incoming air.
Our air conditioning system is fully ducted, however done a little inventively! We’ve decided to piggy-back onto our HRV ductwork to duct our ductless mini-split. Now, say that 5 times fast!
Go To Project Page


 A Ducted Ductless Mini-Split
A “ductless mini-split” or air source heat pump is an ultra-efficient condenser located on the exterior. Lines of coolant connected to the condenser run up the exterior face of the building to “heads” inside the house. These “heads” suck up hot air and, using coolant from the condenser, cool the air and throw it back into the room. What’s great about ductless mini-splits is that they require much less energy than a typical forced air system. They work on a “slow and steady” principle, so the house maintains a much more consistent temperature than big windy AC units. It should be thought of as something that stays on, working lightly and slowly in the background, instead of a forced air AC unit that works on overdrive every time you turn it on.
We’ve decided to tie the mini split into the ductwork. Since it works slowly and steadily from singular heads, if a house has many separate rooms, many heads would be required to fully cool down the entire house – but this can become expensive. By tying the head it into our HRV ductwork via a manifold, we can circulate the air throughout the entire house in a more consistent manner. And that’s how you get a fully ducted, ductless-mini split!
All that’s left to do in this house is finish off the drywall, interiors, appliances and fixtures, and move this family in!
- + Interiors
- White Walls & Exposed Brick
Isn’t it funny how a coat of paint seems to change a space more than the hundreds of hours of work that went in behind that painted wall? Or that you can make a kitchen look brand new by replacing kitchen counters or laminate flooring, while leaving the structure, insulation and HVAC untouched?
Hopefully these blog posts have given some insight into the nitty gritty bits of architecture, the phases of project construction that aren’t quite as glamourous as that final IKEA run or last coat of paint, but are absolutely critical to a good, long-lasting major renovation. But now, the time has come to decide on paint chips, floors, countertops and finishes. And though we all understand that there’s a lot more to a major, energy efficient renovation than just interiors, finally getting to choose those stylistic elements sure is satisfying.
So now, without further ado, we’re finally ready to start working on Bickford Park’s decor and interiors. Yes!
Our clients wanted this semi-detached Toronto house richly textured and beautifully detailed, with classic art deco elements and decor. Recalling their client homework, their dream home was dramatic and artistic, where every room had unique flair. They were specifically interested in nice, clean baseboards, crown moldings, and warm walnut floors, and trusted us to choose all the tiles, finishes and colours to fit with their warm aesthetic. We opted for some Solares standards, like white IKEA cabinetry, and added some unique features we knew our clients would love, like custom stone countertops in the kitchen, and we made sure every bathroom had its own individual palette. We also ensured that there was plenty of built-in storage and closet space in every room, to make a tidy house easy to keep.
One feature that was really special to our client was the exposed brick wall that our feature stair wound up on every floor. Our client was adamant to keep it exposed, which is a hit in insulation and air tightness. We warned them that their neighbor’s sounds, smells, heat, and air could all transfer through this shared brick wall – if their neighbors like loud parties and aromatic foods, our clients might soon find out! If insulated and covered over, the house would be quieter and generally more private. But as a cool, beautiful, and impressive feature in the space, it was deemed definitely worth the hit in air tightness and potential neighborly disruptions.
We’re as excited as our clients to see this project complete. If only we could all move in alongside them!
Go To Project Page


- + Reveal
- The Finished Bickford Park!
The paint has dried, the paintings are hung, the bookshelves filled, and the furniture in place. Bickford Park is complete! Our clients have moved in and they love their new and efficient home. We love this house too: it’s the perfect combination of clean, open, and elegant, yet, friendly, warm, and welcoming.
One of the things our clients love the most is the amount of doors leading outside – there are four on the main floor! The front door, painted a bright lime green, gives the house a look of whimsy from the sidewalk; a set of French doors open up to the dreamy front porch and garden; a “side” door off the kitchen, leads to the back barbeque; and at the very back of the house, a set of large glass doors opens up to the spacious backyard, flooding the living room with light and air. This connectivity enables the front garden and the backyard to become a cohesive part of the main floor. Inside, the dining room table is tucked in the front bay overlooking the porch and garden. Past this, a large kitchen island with a central exhaust hood creates a cool and industrial feel and splits the dining room from the living room.
The second floor front room has been filled with musical instruments, toys, and books. The sun shines through the western bay window and the glass French doors provide some privacy from the second floor hallway and stairs, so the kids can practice piano and ukulele – or the parents can get some work done in the office space – in peace. The serene master bedroom includes an ensuite bathroom, in blue-grey and tile, and a big east-facing window. And who wouldn’t want a laundry room like theirs? Off the second floor hallway, the spacious room has vintage checkered floors and tons of counter and storage space, so everyone can pitch in on the chores.
The kids’ rooms on the top floor are sleepy and magical, with slanting ceiling, canopy beds, and soft streaming light through the north and west windows. Tons of open space means the kids can scatter the floor with toys and play together or separately in their own bedrooms.
Go To Project Page


 Final Efficiency Stats
Sure, the place looks like a dream, but the cold hard stats prove that this place is dead serious when it comes to efficiency. With a 71% reduction in Annual Heat Loss, and an 81% reduction in space heating, the place is comfortable and warm – or cool! – with little effort and waste. The final air leakage rate is over 3 times more air-tight than before renovations, at 4.45ACH@50Pa. That’s a shocking difference from the previous 14.31 ACG@50Pa! And the new renovation boasts a near 15-tonne reduction in annual greenhouse gas emissions – that’s equivalent to what 5 Honda Civics combined produce in one year!
The Energuide rating began at 22, the lowest Solares had ever seen! Now the rating has soared to 76, even without any basement renovations. Remember, the home’s basement is still completely unfinished, which makes the home’s “final” stats that much more impressive. Once our clients insulate and air seal the basement in a few years, these impressive ratings will only get better!
Thanks to our very own Melodie Coneybeare, the home was lovingly and exceptionally designed. Working closely with the clients, Melodie was able to design a home that suits their needs, goals and budget. And we couldn’t have seen this project through without our awesome General Contractor, Jesse Hayes, who slaved painstakingly over every little detail to make this house perfect. Thank you for all your hard work, Jesse!
And finally, we want to thank our clients who were so great to work with. It’s such a joy to see them happily living in their new Solares home.


